
One of our biggest concerns in our family is food security. One of the easiest ways to get food security is to grow most of your own food. With a very small garden, we have managed to easily grow and harvest about 75% of the food we eat on a daily basis. The only foods we don’t grow are things like rice which is water and labor intensive and beans which are also incredibly labor intensive. At some point last year we decided to build a greenhouse to grow food year round, but we didn’t want to heat it (we are off grid) and we had a budget of $4000. After about 500 man hours of labor and less than $4000 for materials, we’ve created something we are pretty proud of and that doesn’t seem to usually dip much below freezing even without heat.

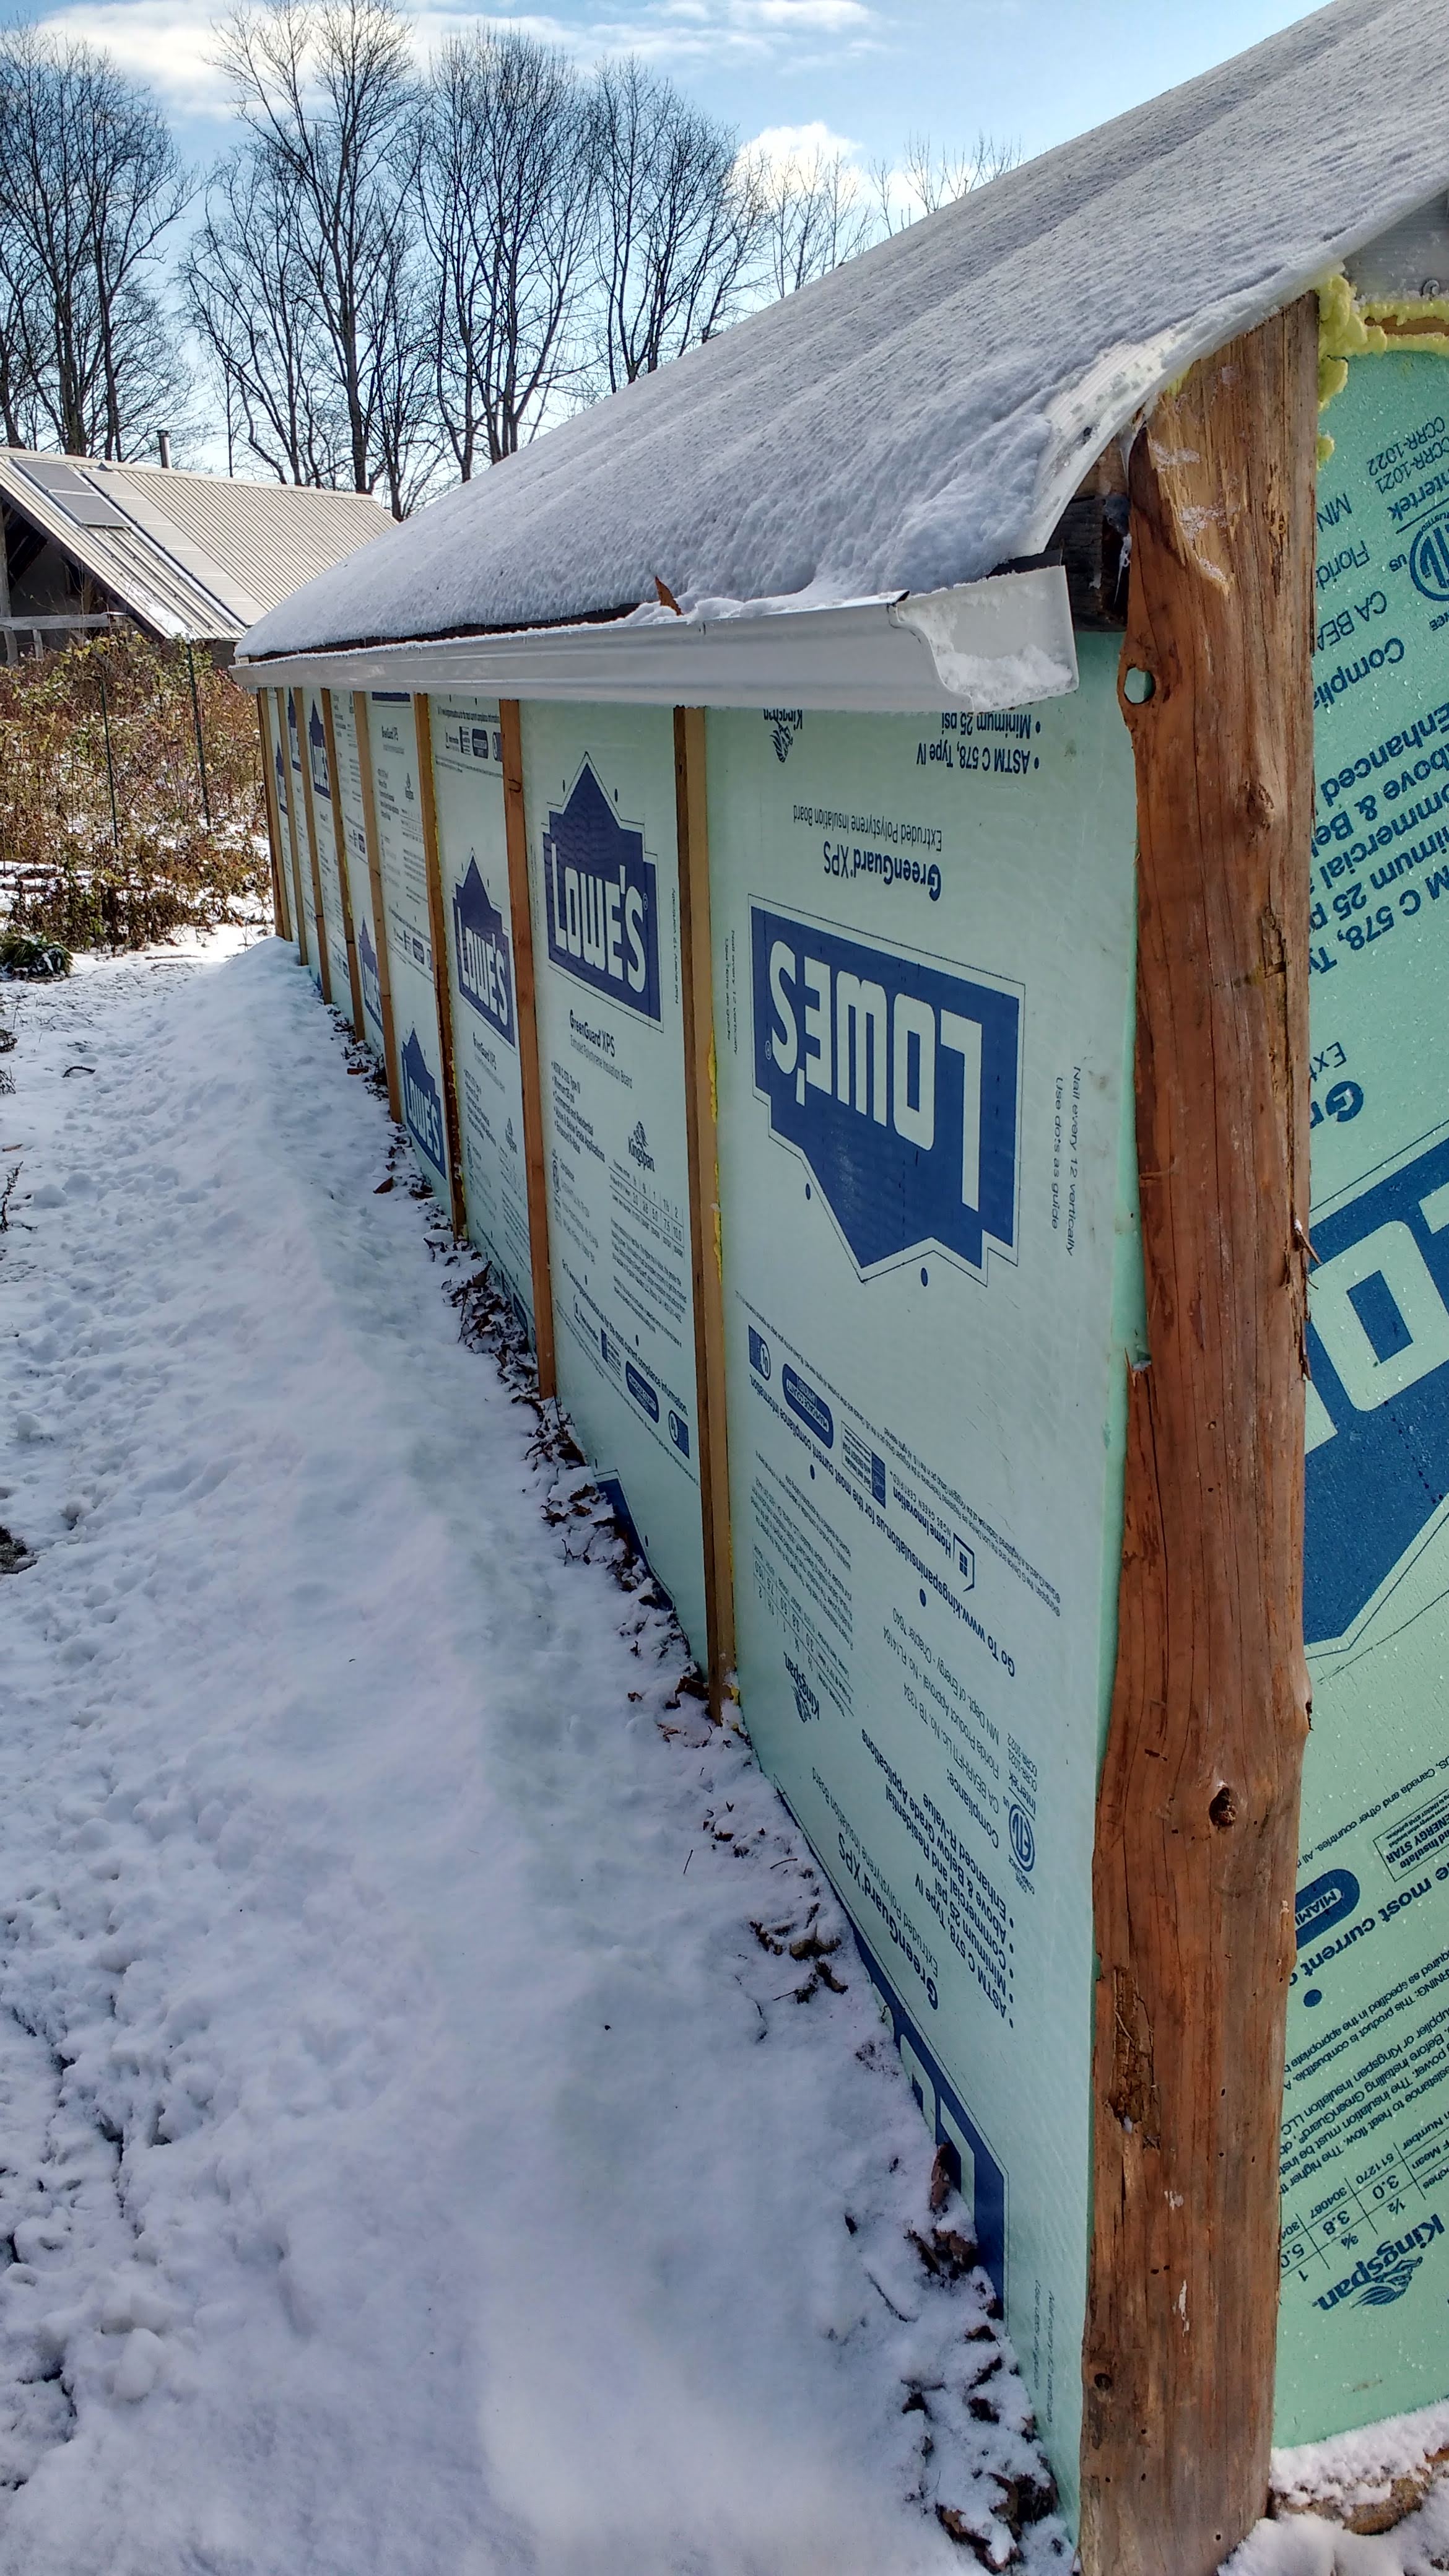
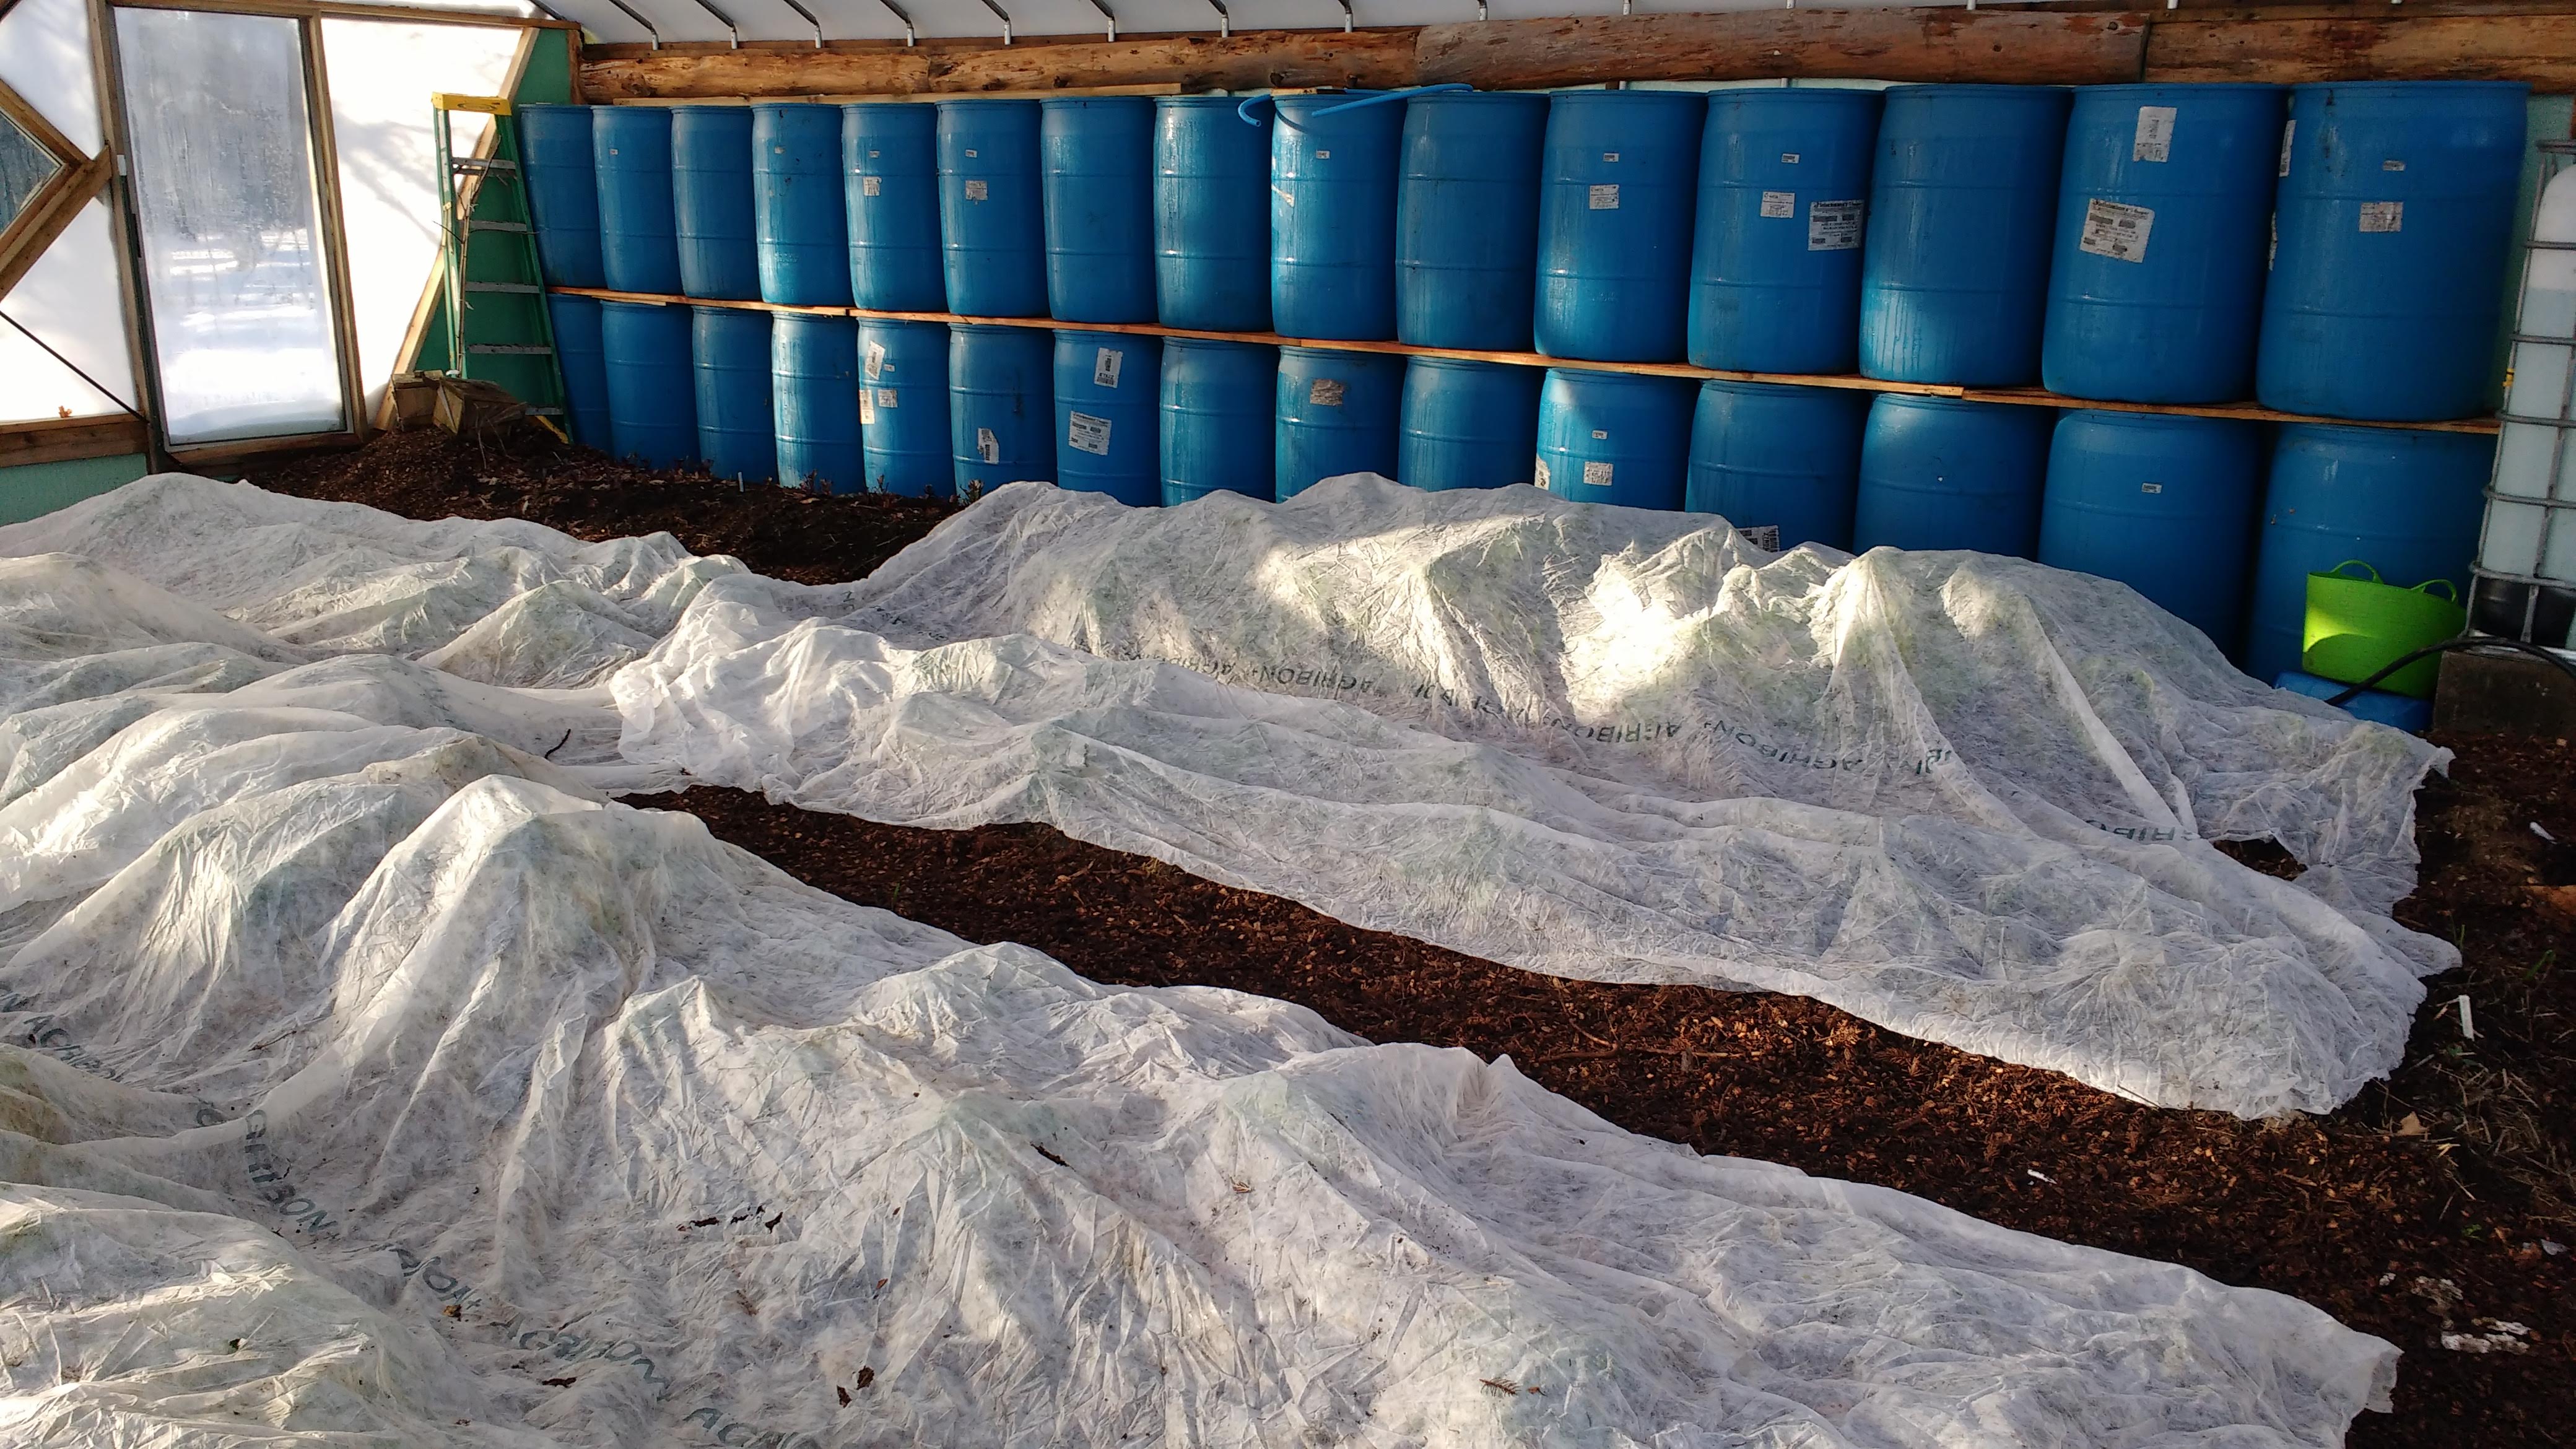
The back wall of the greenhouse we insulated with R10 Extruded Polystyrene board behind 30 55 Gallon drums filled with water. We dug out around the outside of the greenhouse about 2 feet then backfilled with gravel. For the vertical posts, I smashed the end of 1″ steel pipes flat then pounded them into the ground with a fence post pounder. I used a laser level and a pipe cutter to cut all the pipes off at the same height.
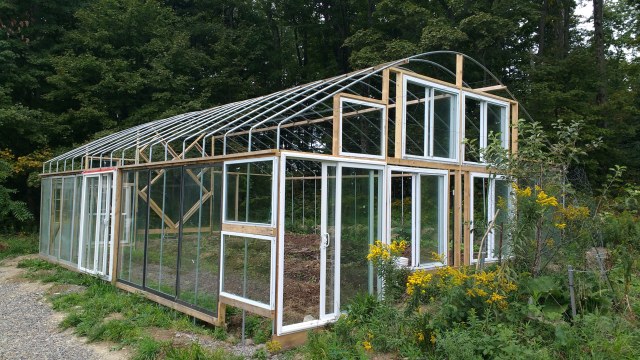
While I was working I built some 2×4’s with 1″ holes in them to use as spacers. Since the frame was a little flimsy, once we got the arches up and the purlins in I just hooked up a ratchet strap to a tree to straighten up the greenhouse. With the purlins, I cut notches every 2′ and then screwed them into the arches from underneath. Dealing with a steel frame was the biggest headache of the entire project. Once I realized I could use ‘Tap Magic’ on the drills I went from being able to drill 2-3 holes with every drill bit to hundreds of holes. The galvanized steel on the arches was over 1/8″ thick and it was very difficult to drill into.
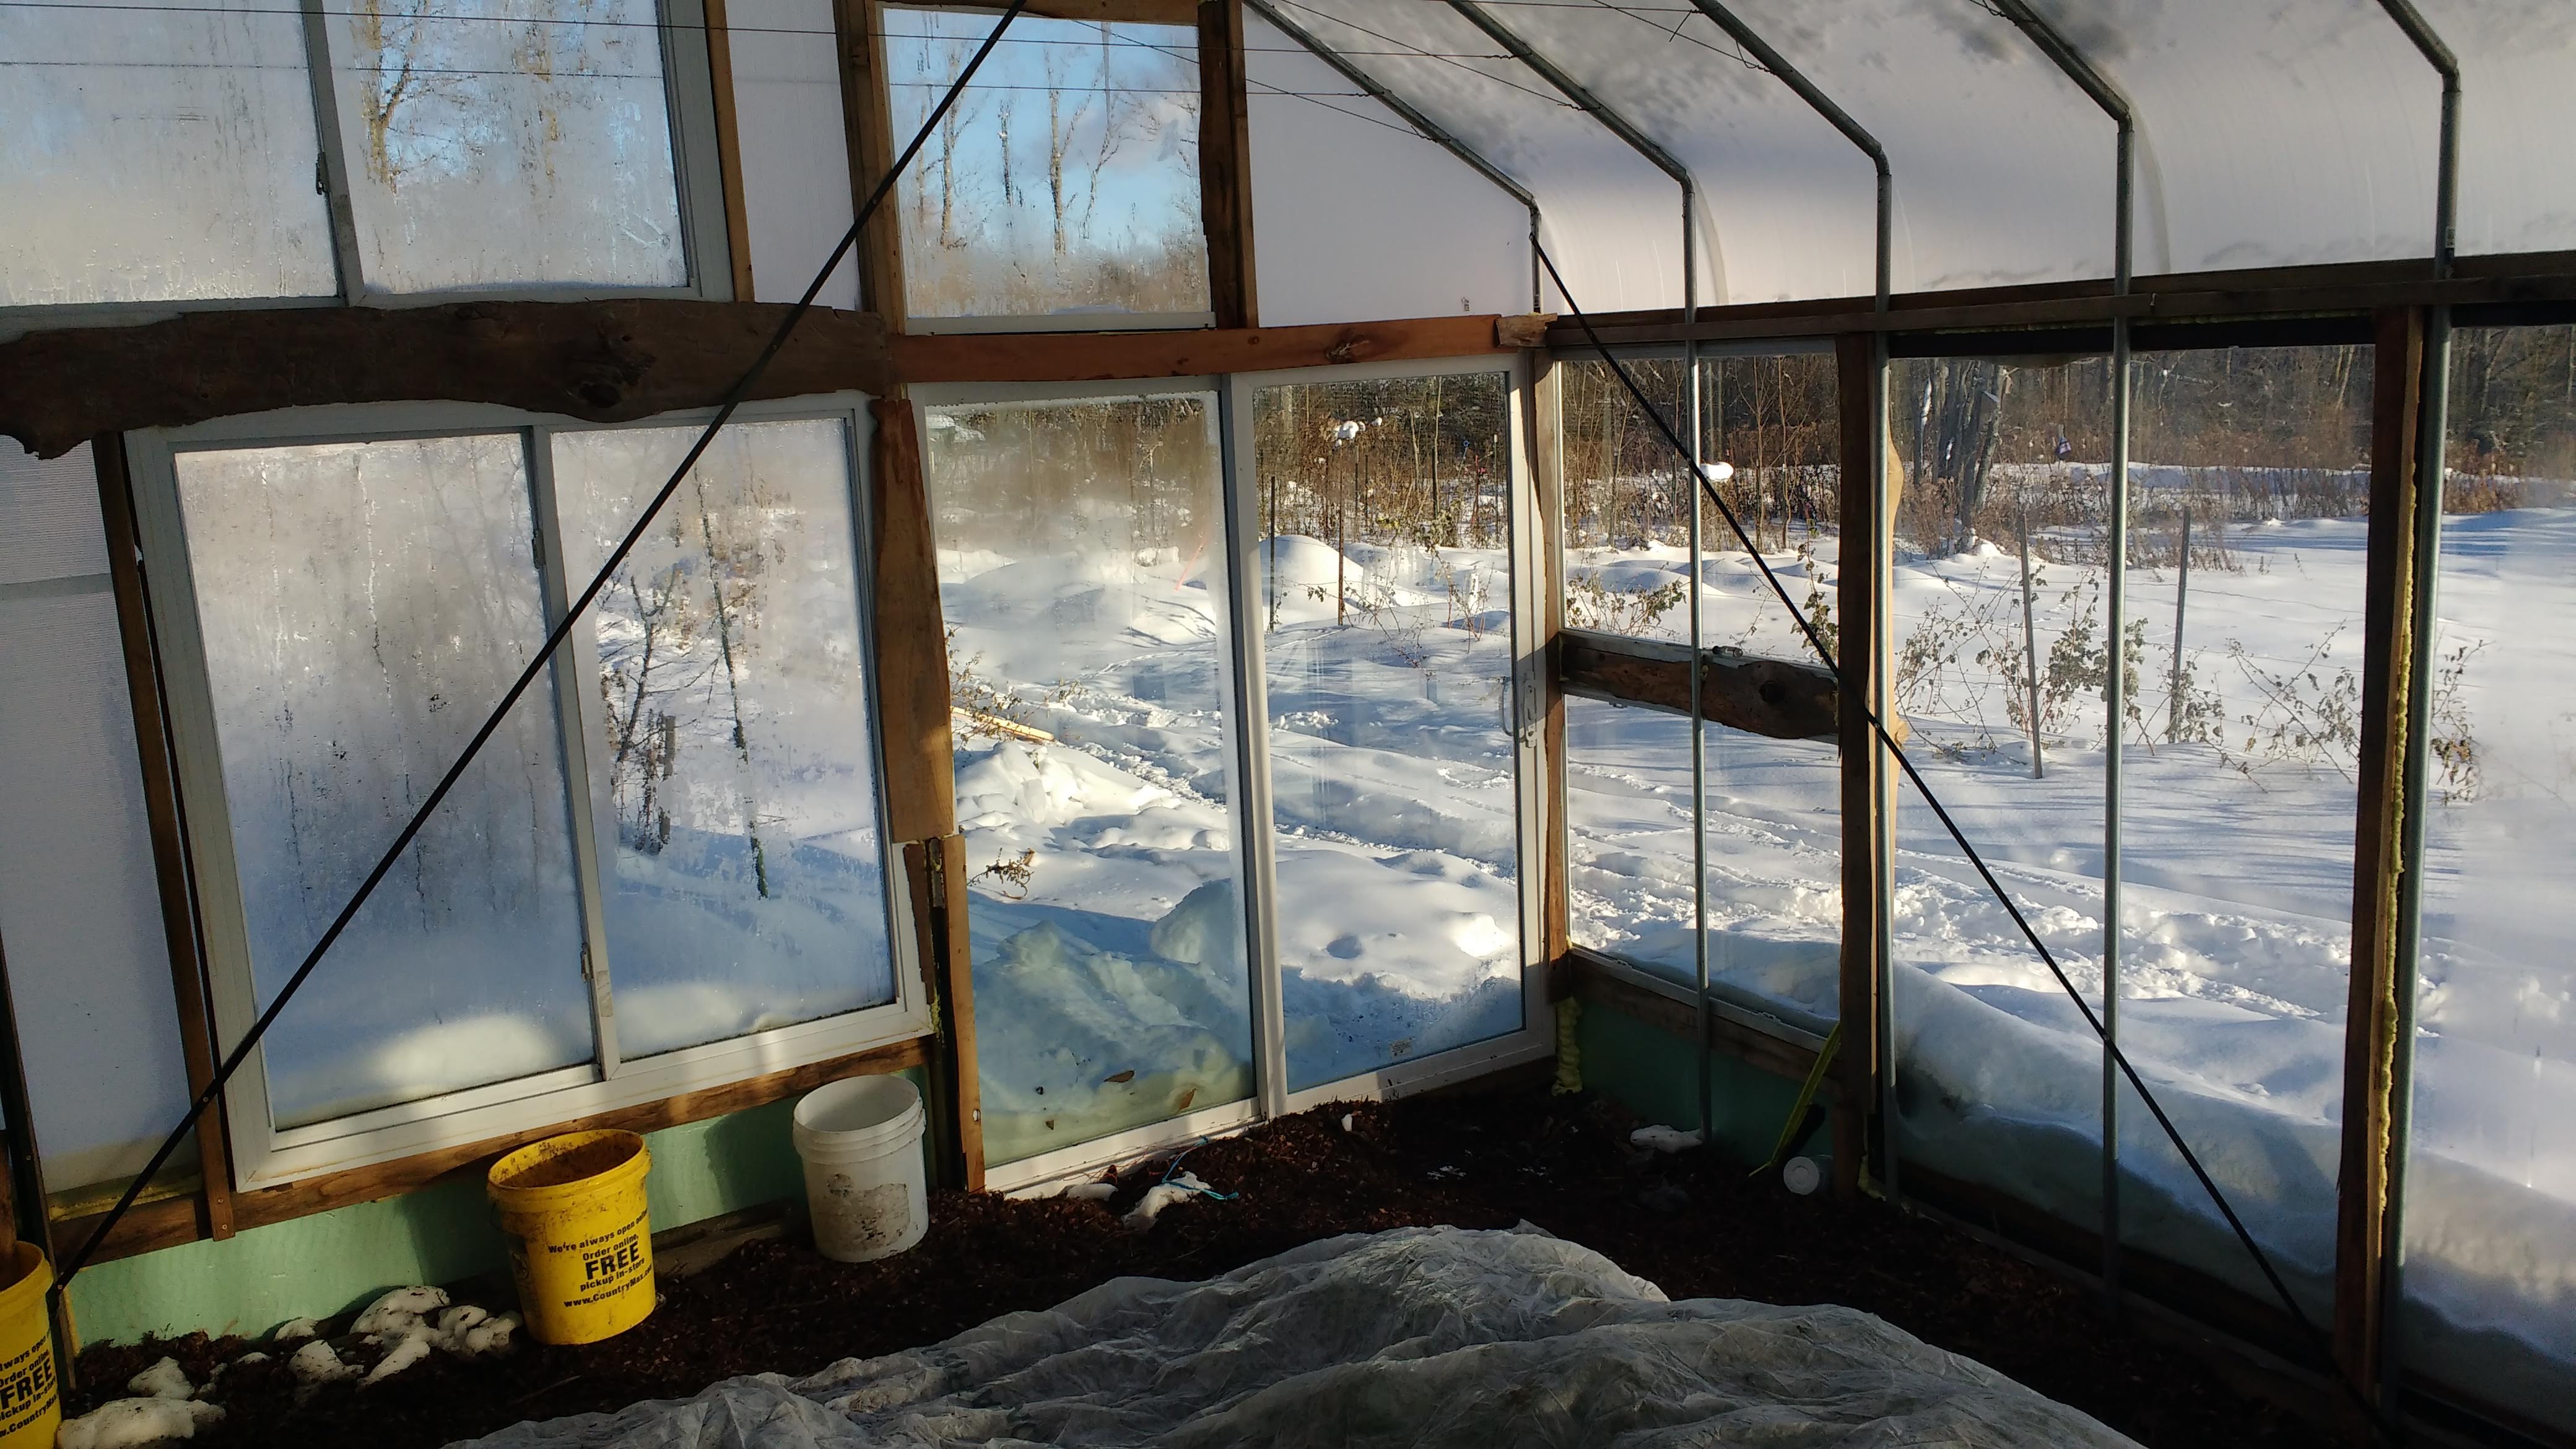
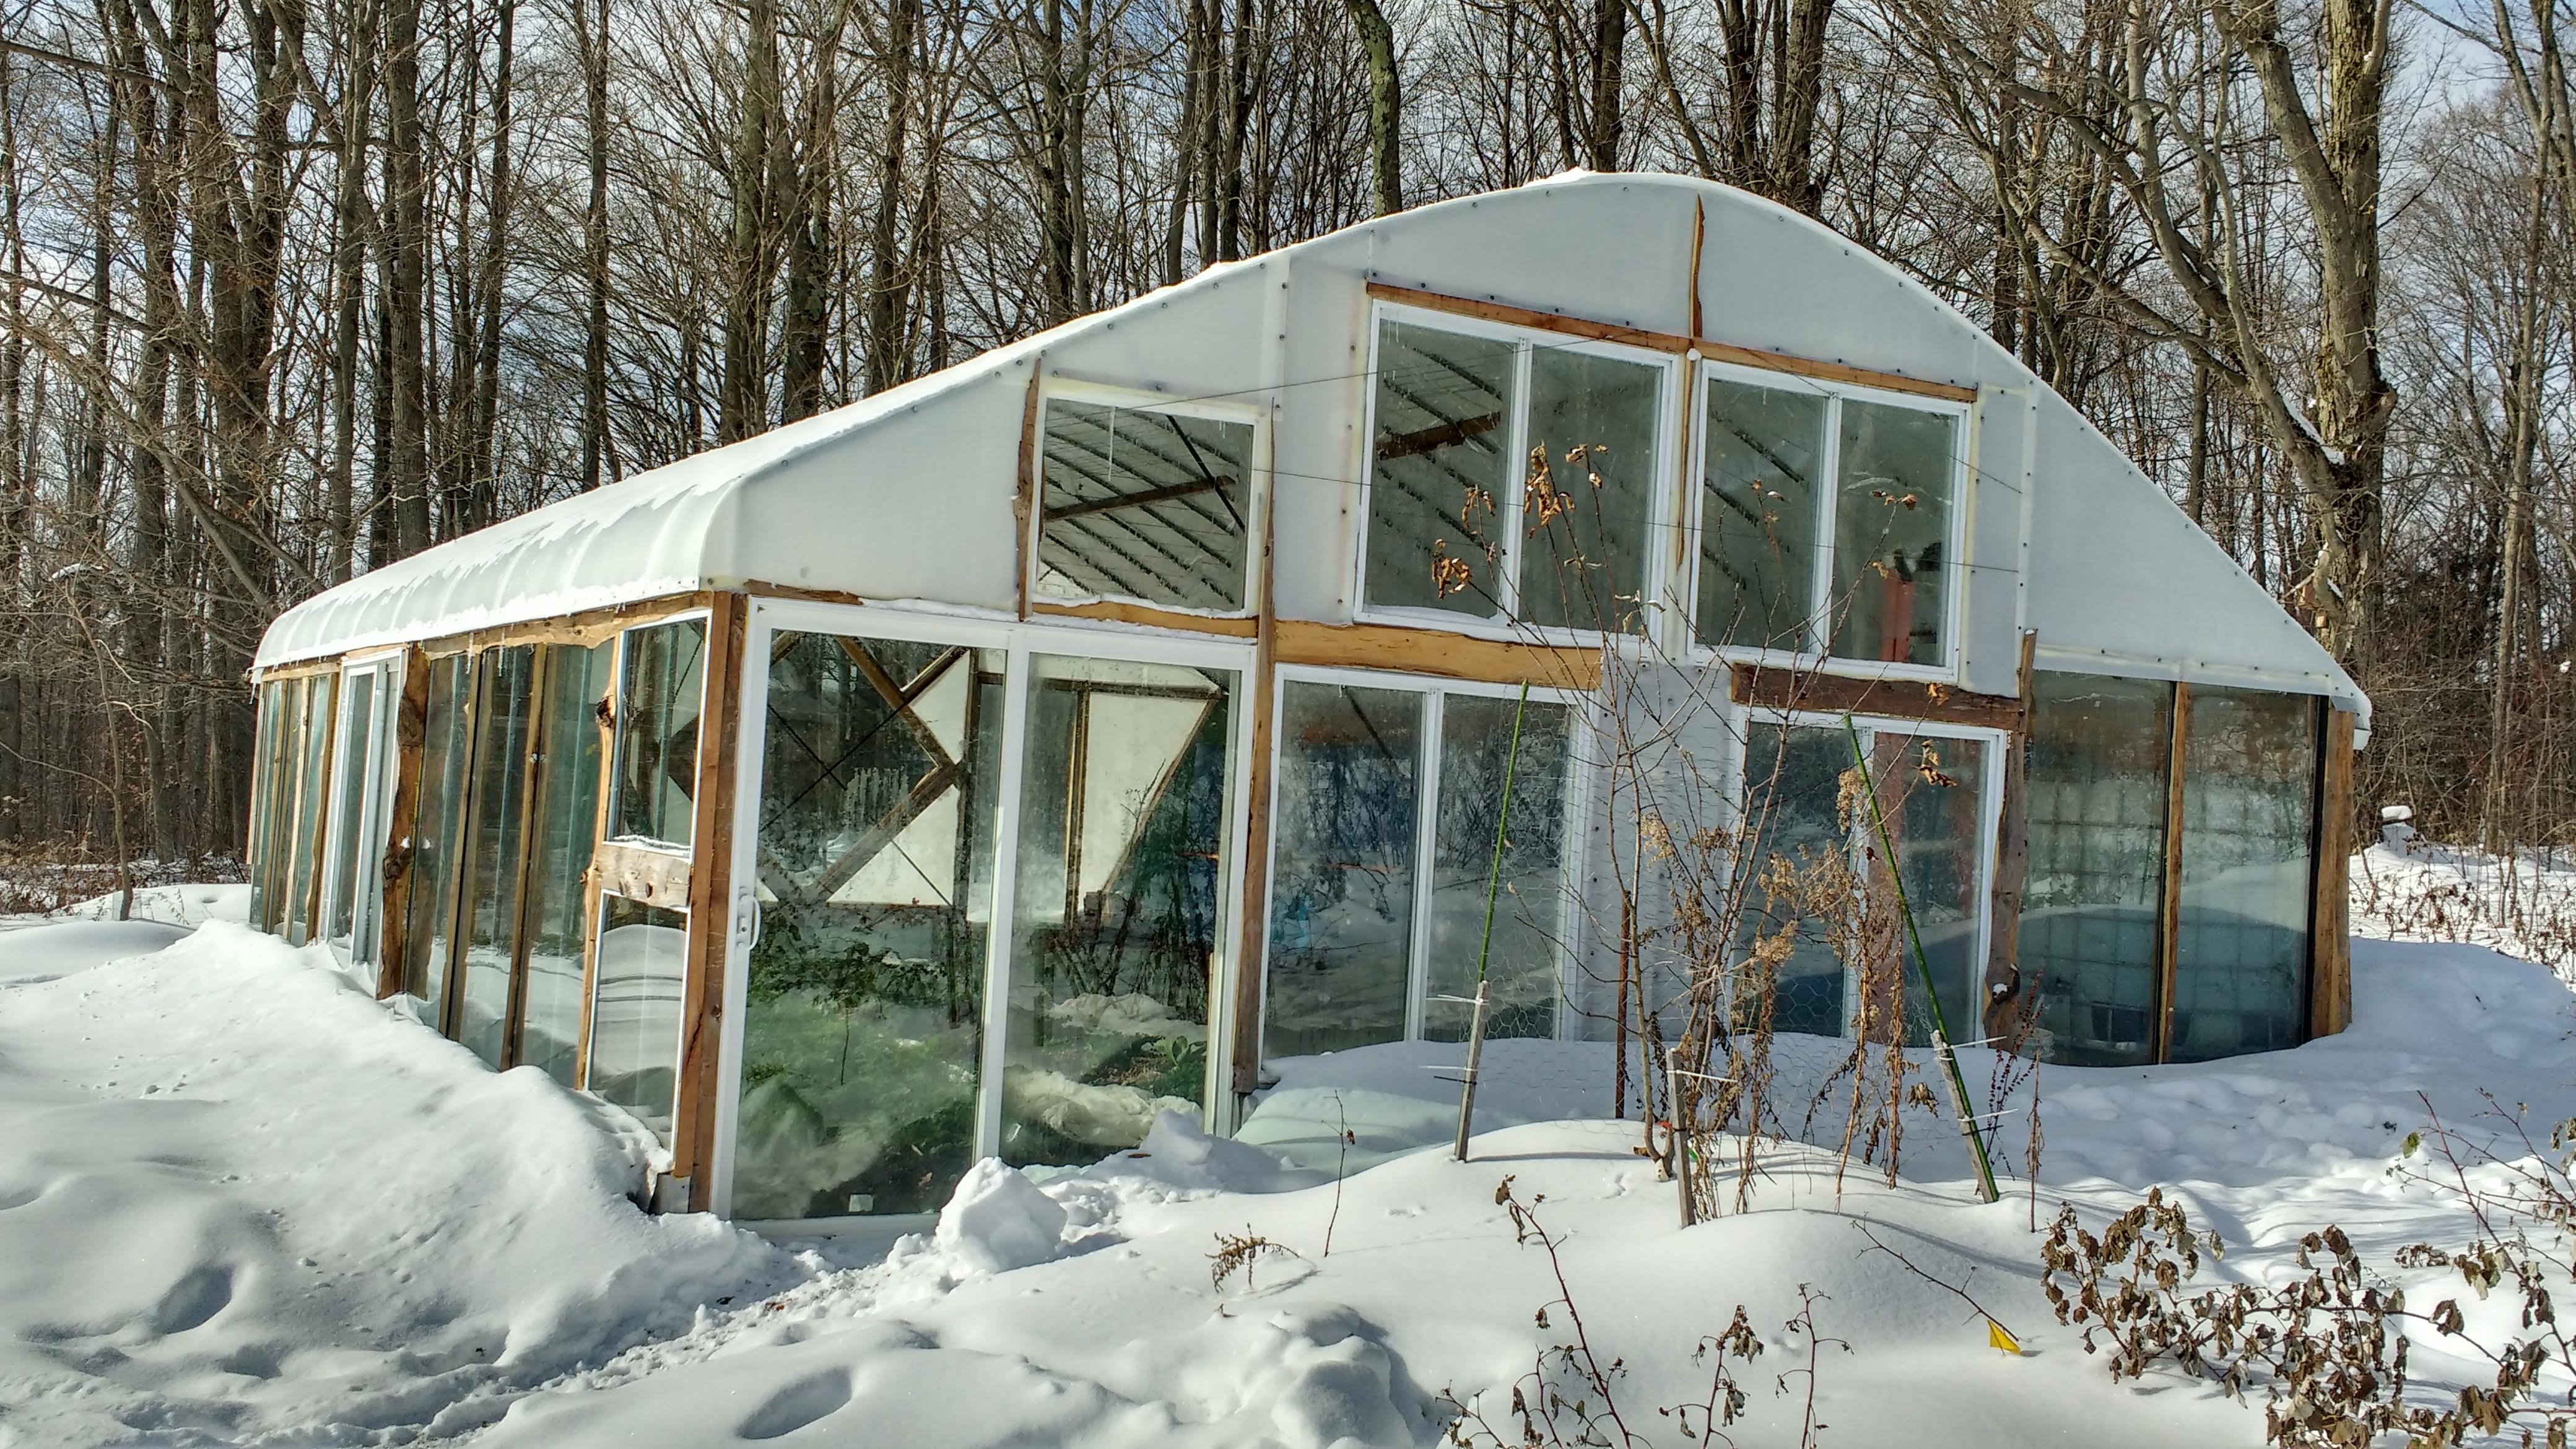
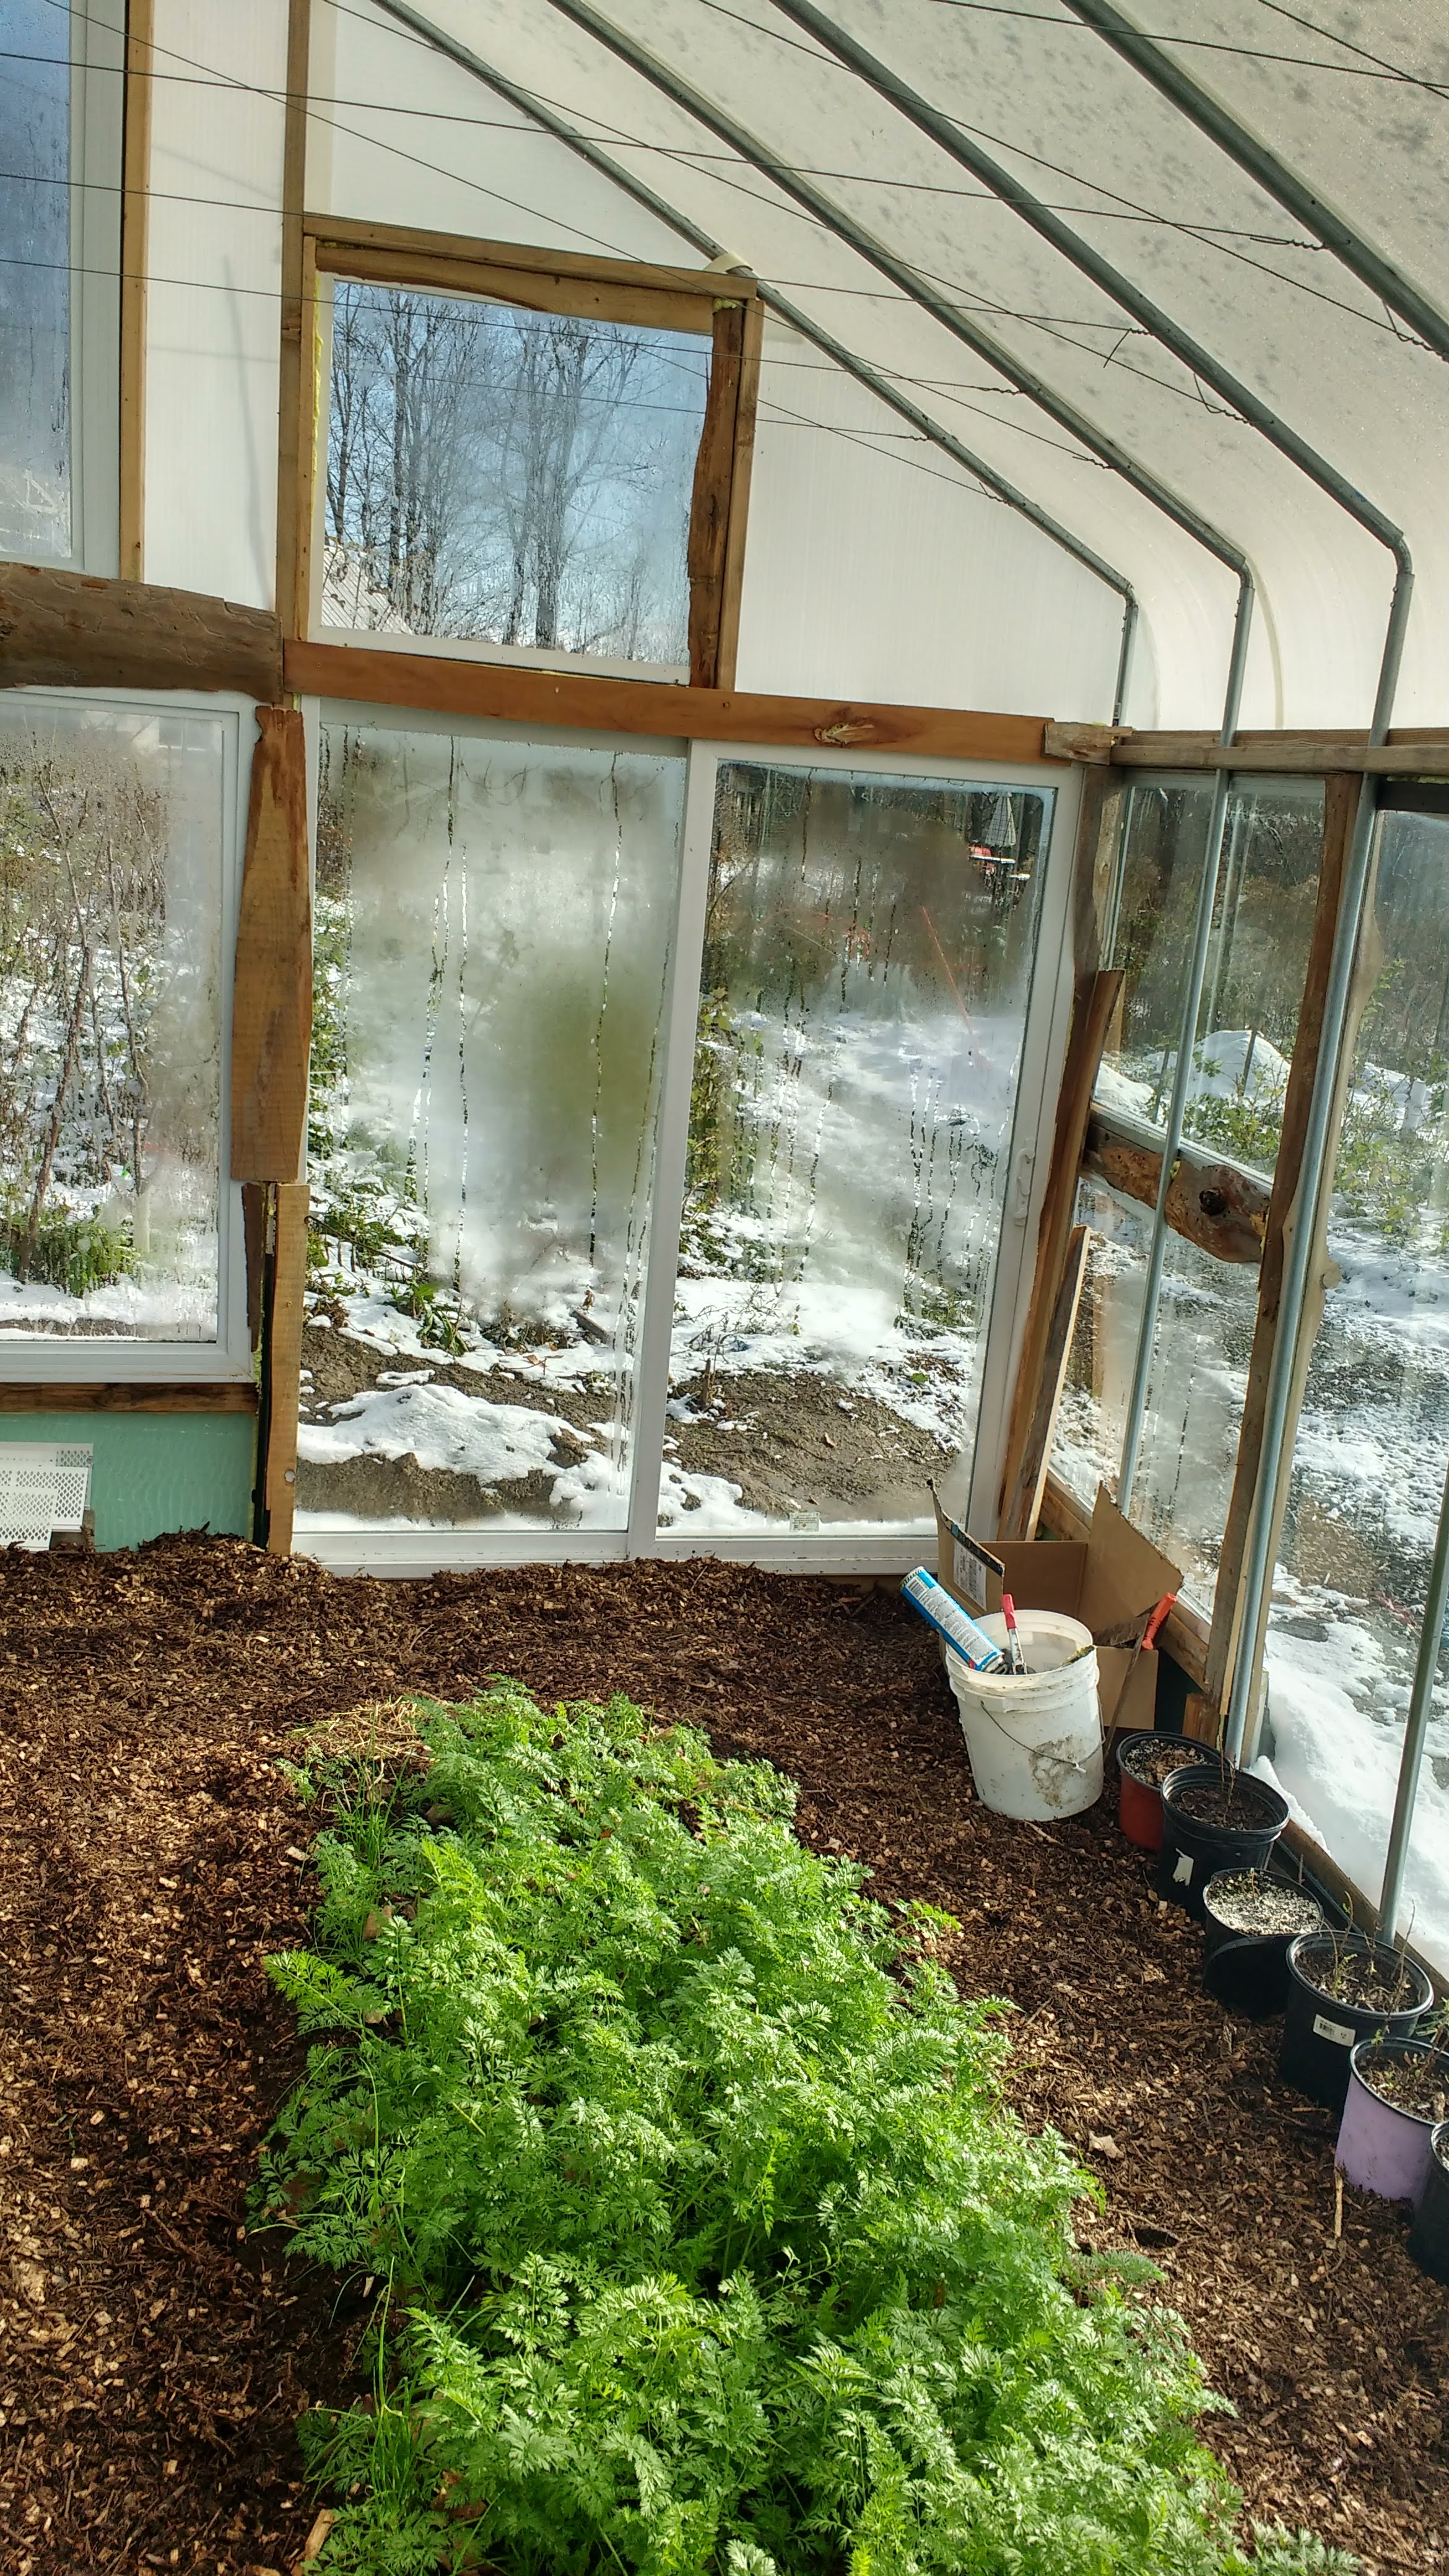
With the exception of one sliding glass door every single window and door in the greenhouse is reclaimed. It’s amazing what kind of deals you can get at your local hardware reuse center. If you’re buying a lot of stuff you can get even deeper discounts. We paid about $250 for the one new slider and all the other windows in the greenhouse were less than $300 for everything.
When sealing up the inside it is imperative that you seal every single little airspace. We used a $50 foam gun and $12 cans of great stuff. These guns give you way more control than using the disposable $5 cans of foam and they have at least twice the amount of foam that the cans have. The trick with the cans is to make sure the screw on the back is all the way tightened down when not in use and the can is always stored in an upright configuration (can up). That way any air inside the gun will rise to the top of the can and not into the gun and clog it up. When switching cans of foam I also use the spray acetone cleaner and quickly spray out the area where the foam feeds into the gun. I tried using the spray acetone to clean out the gun, but you end up using almost the entire can and the gun locked up anyway.
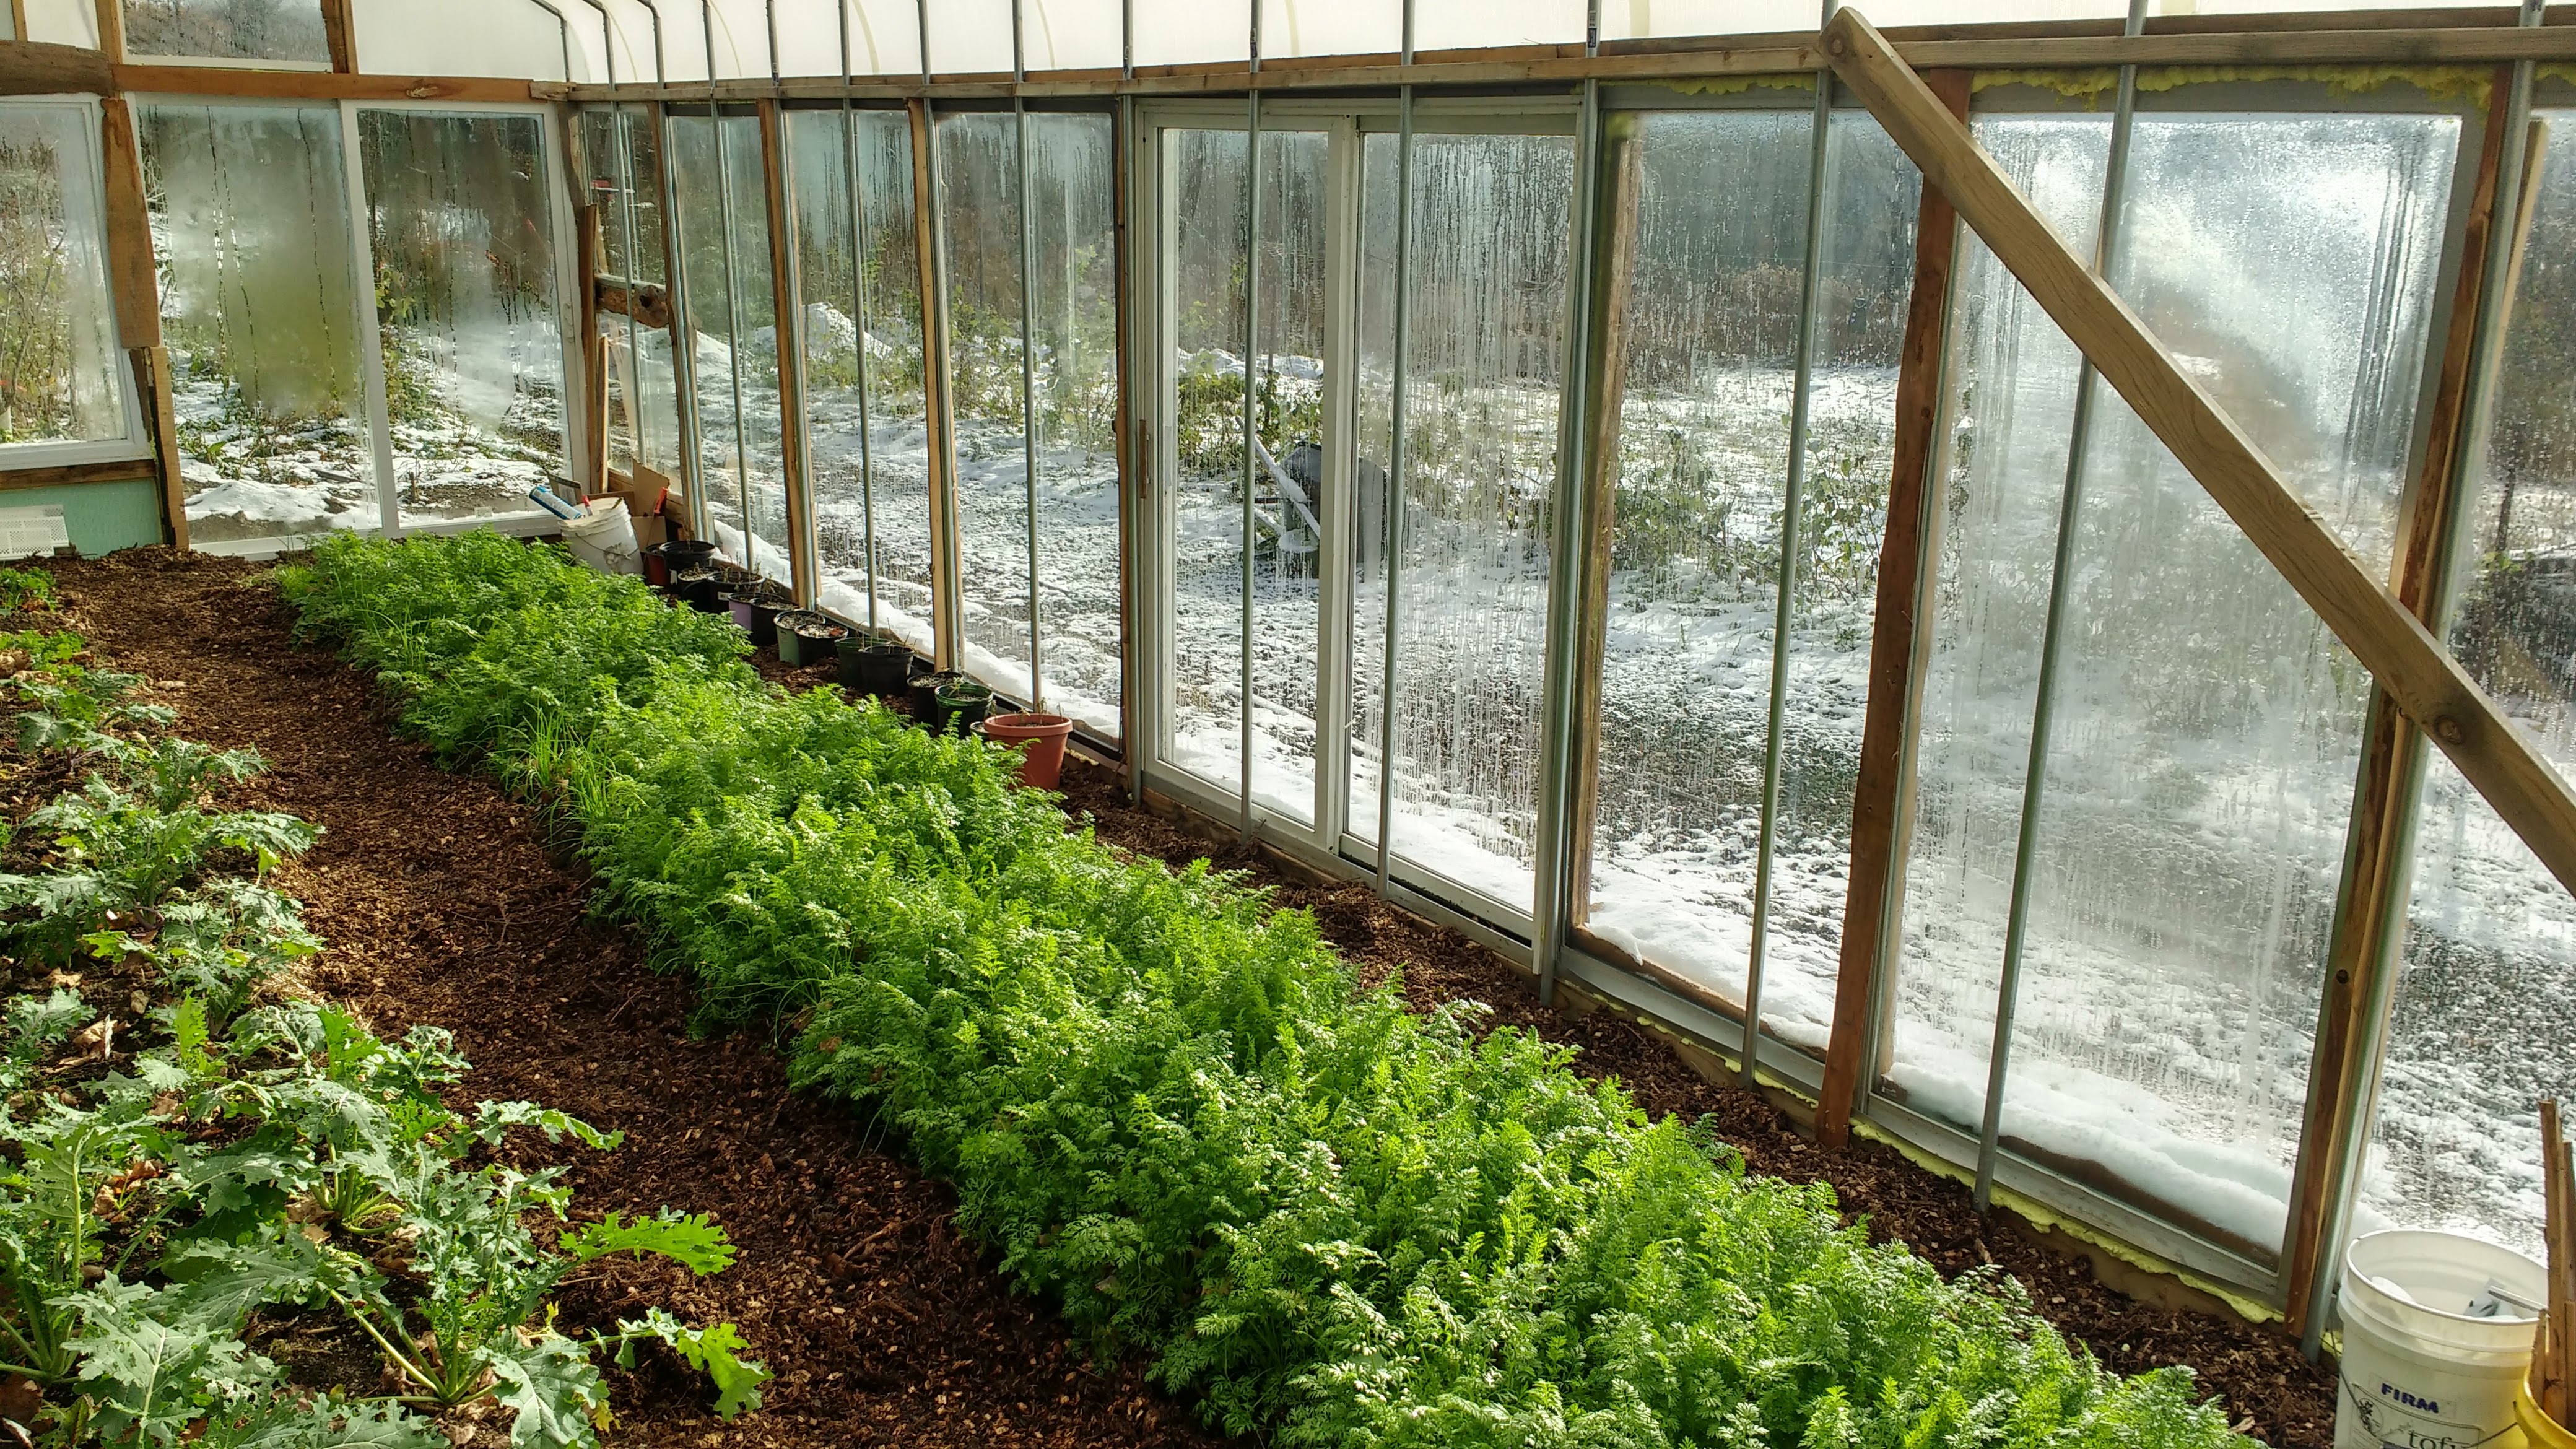
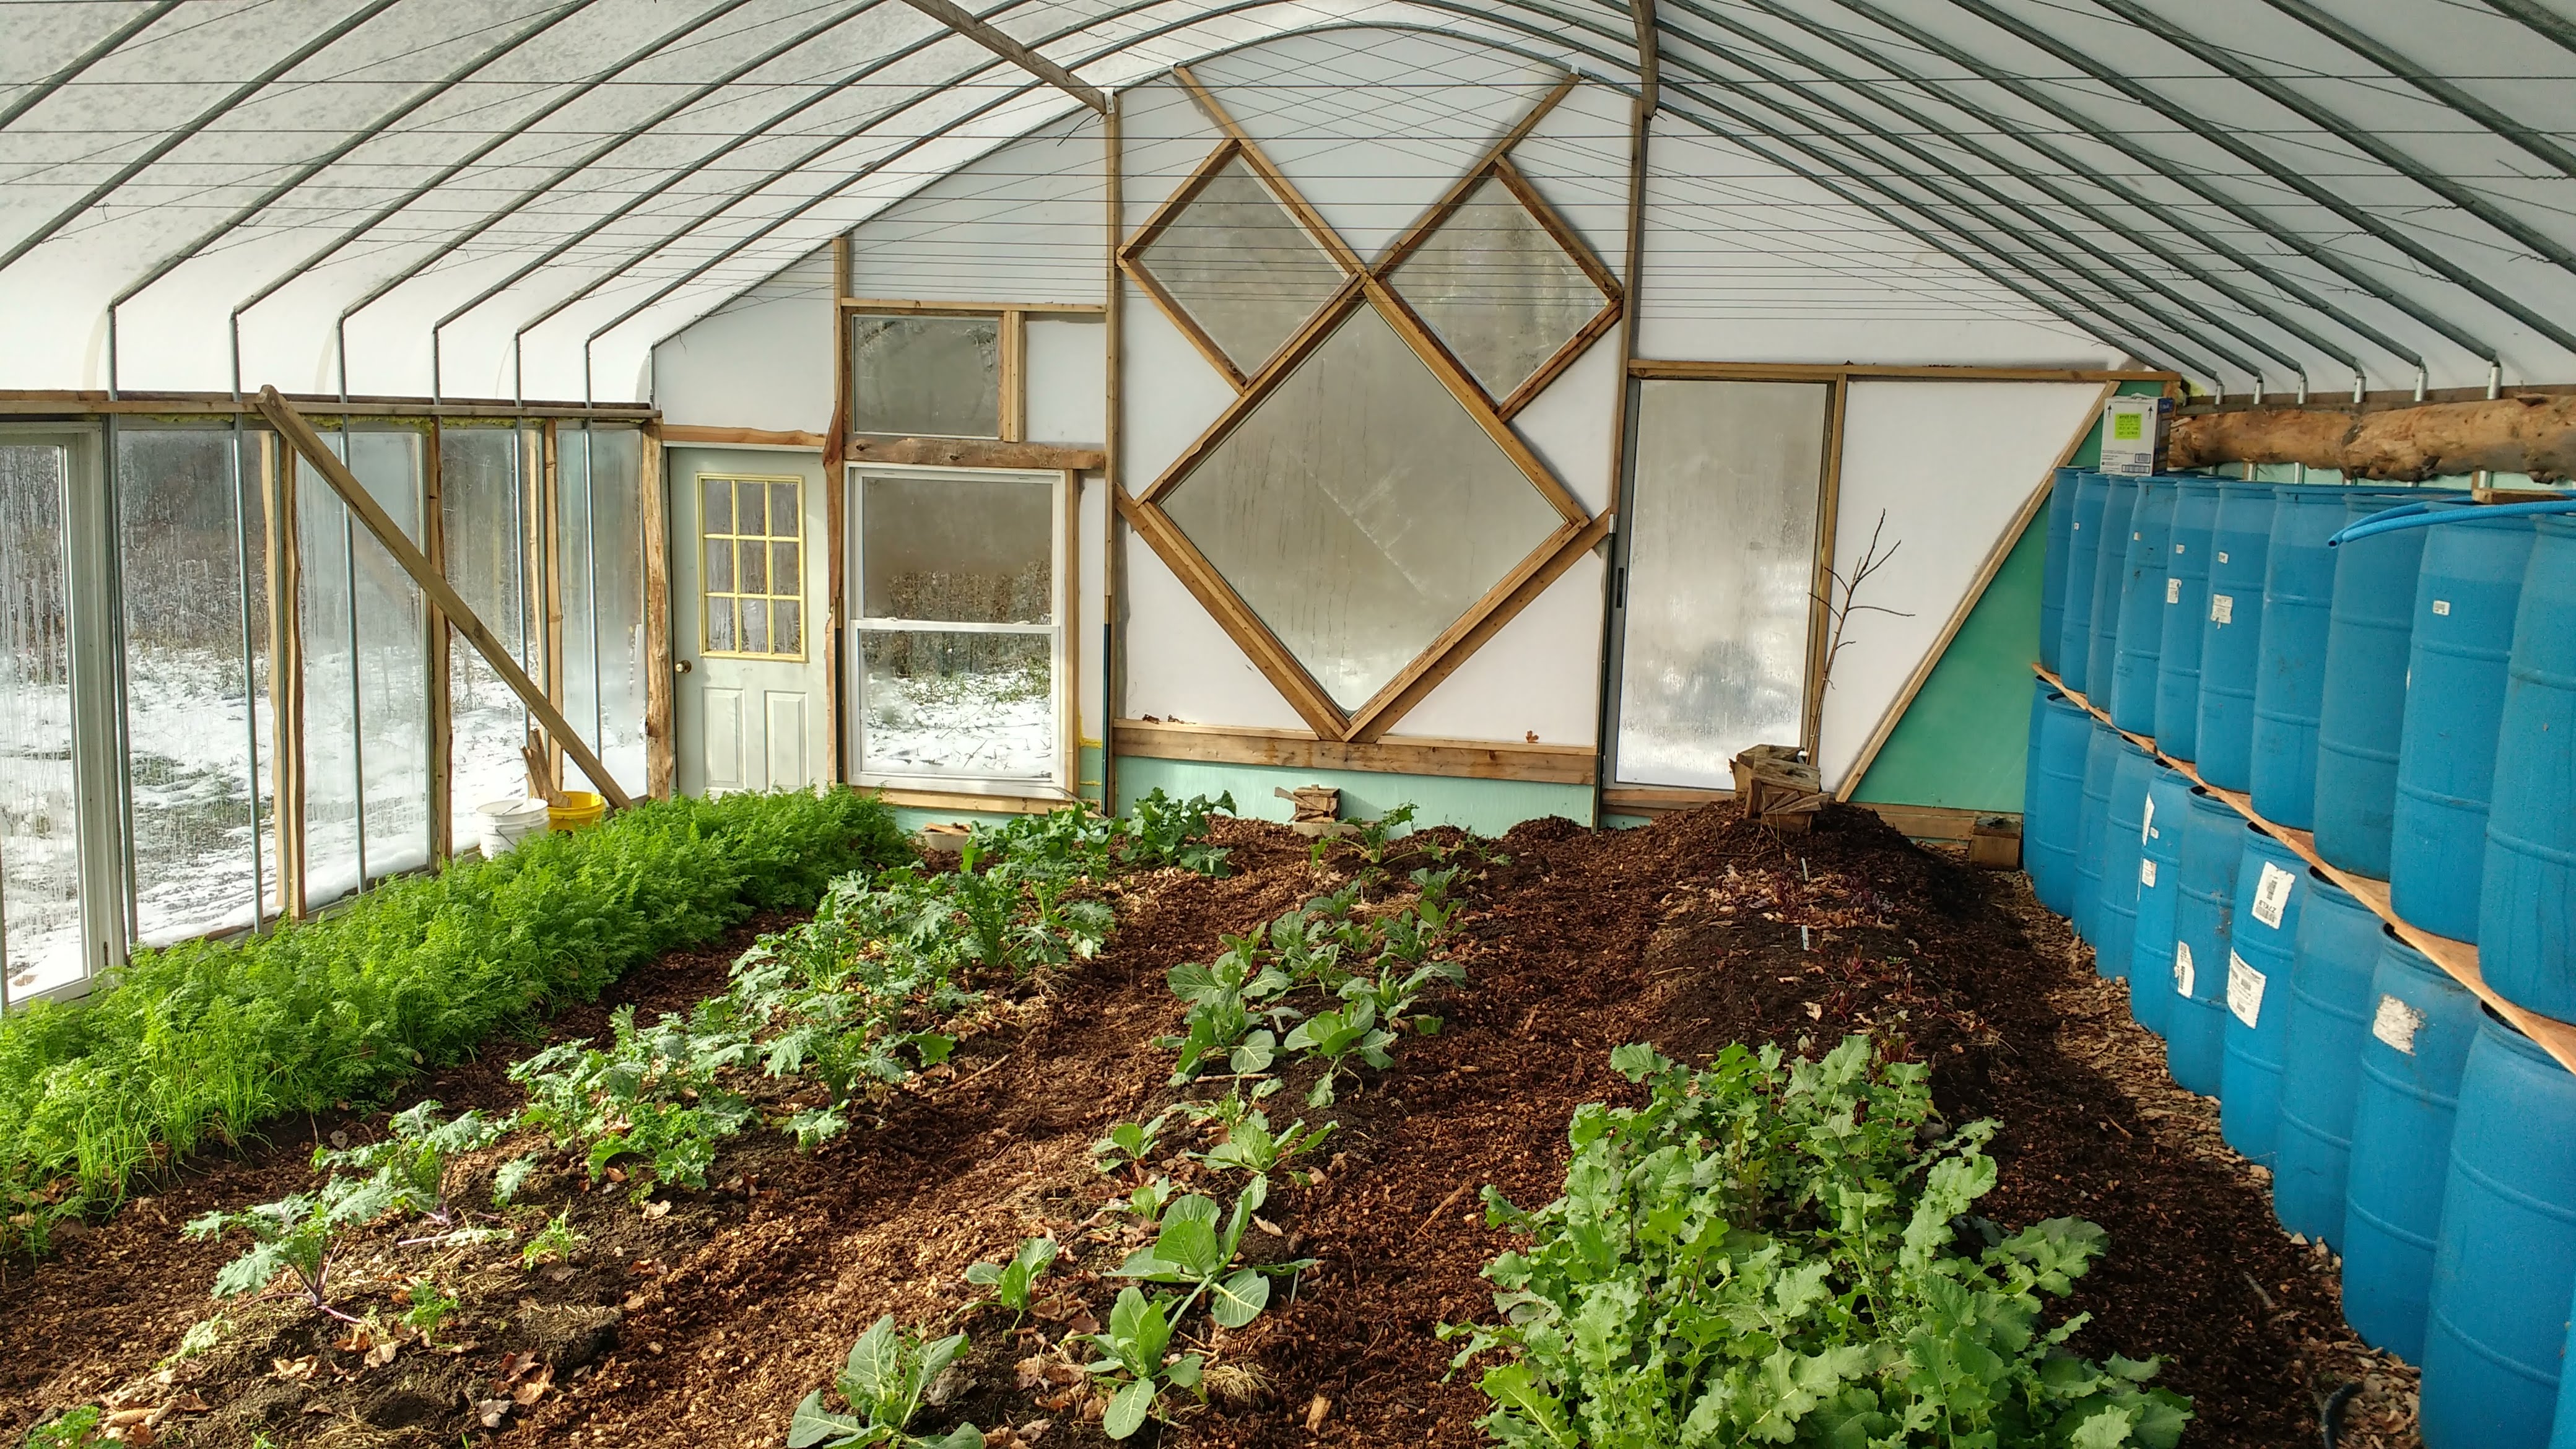
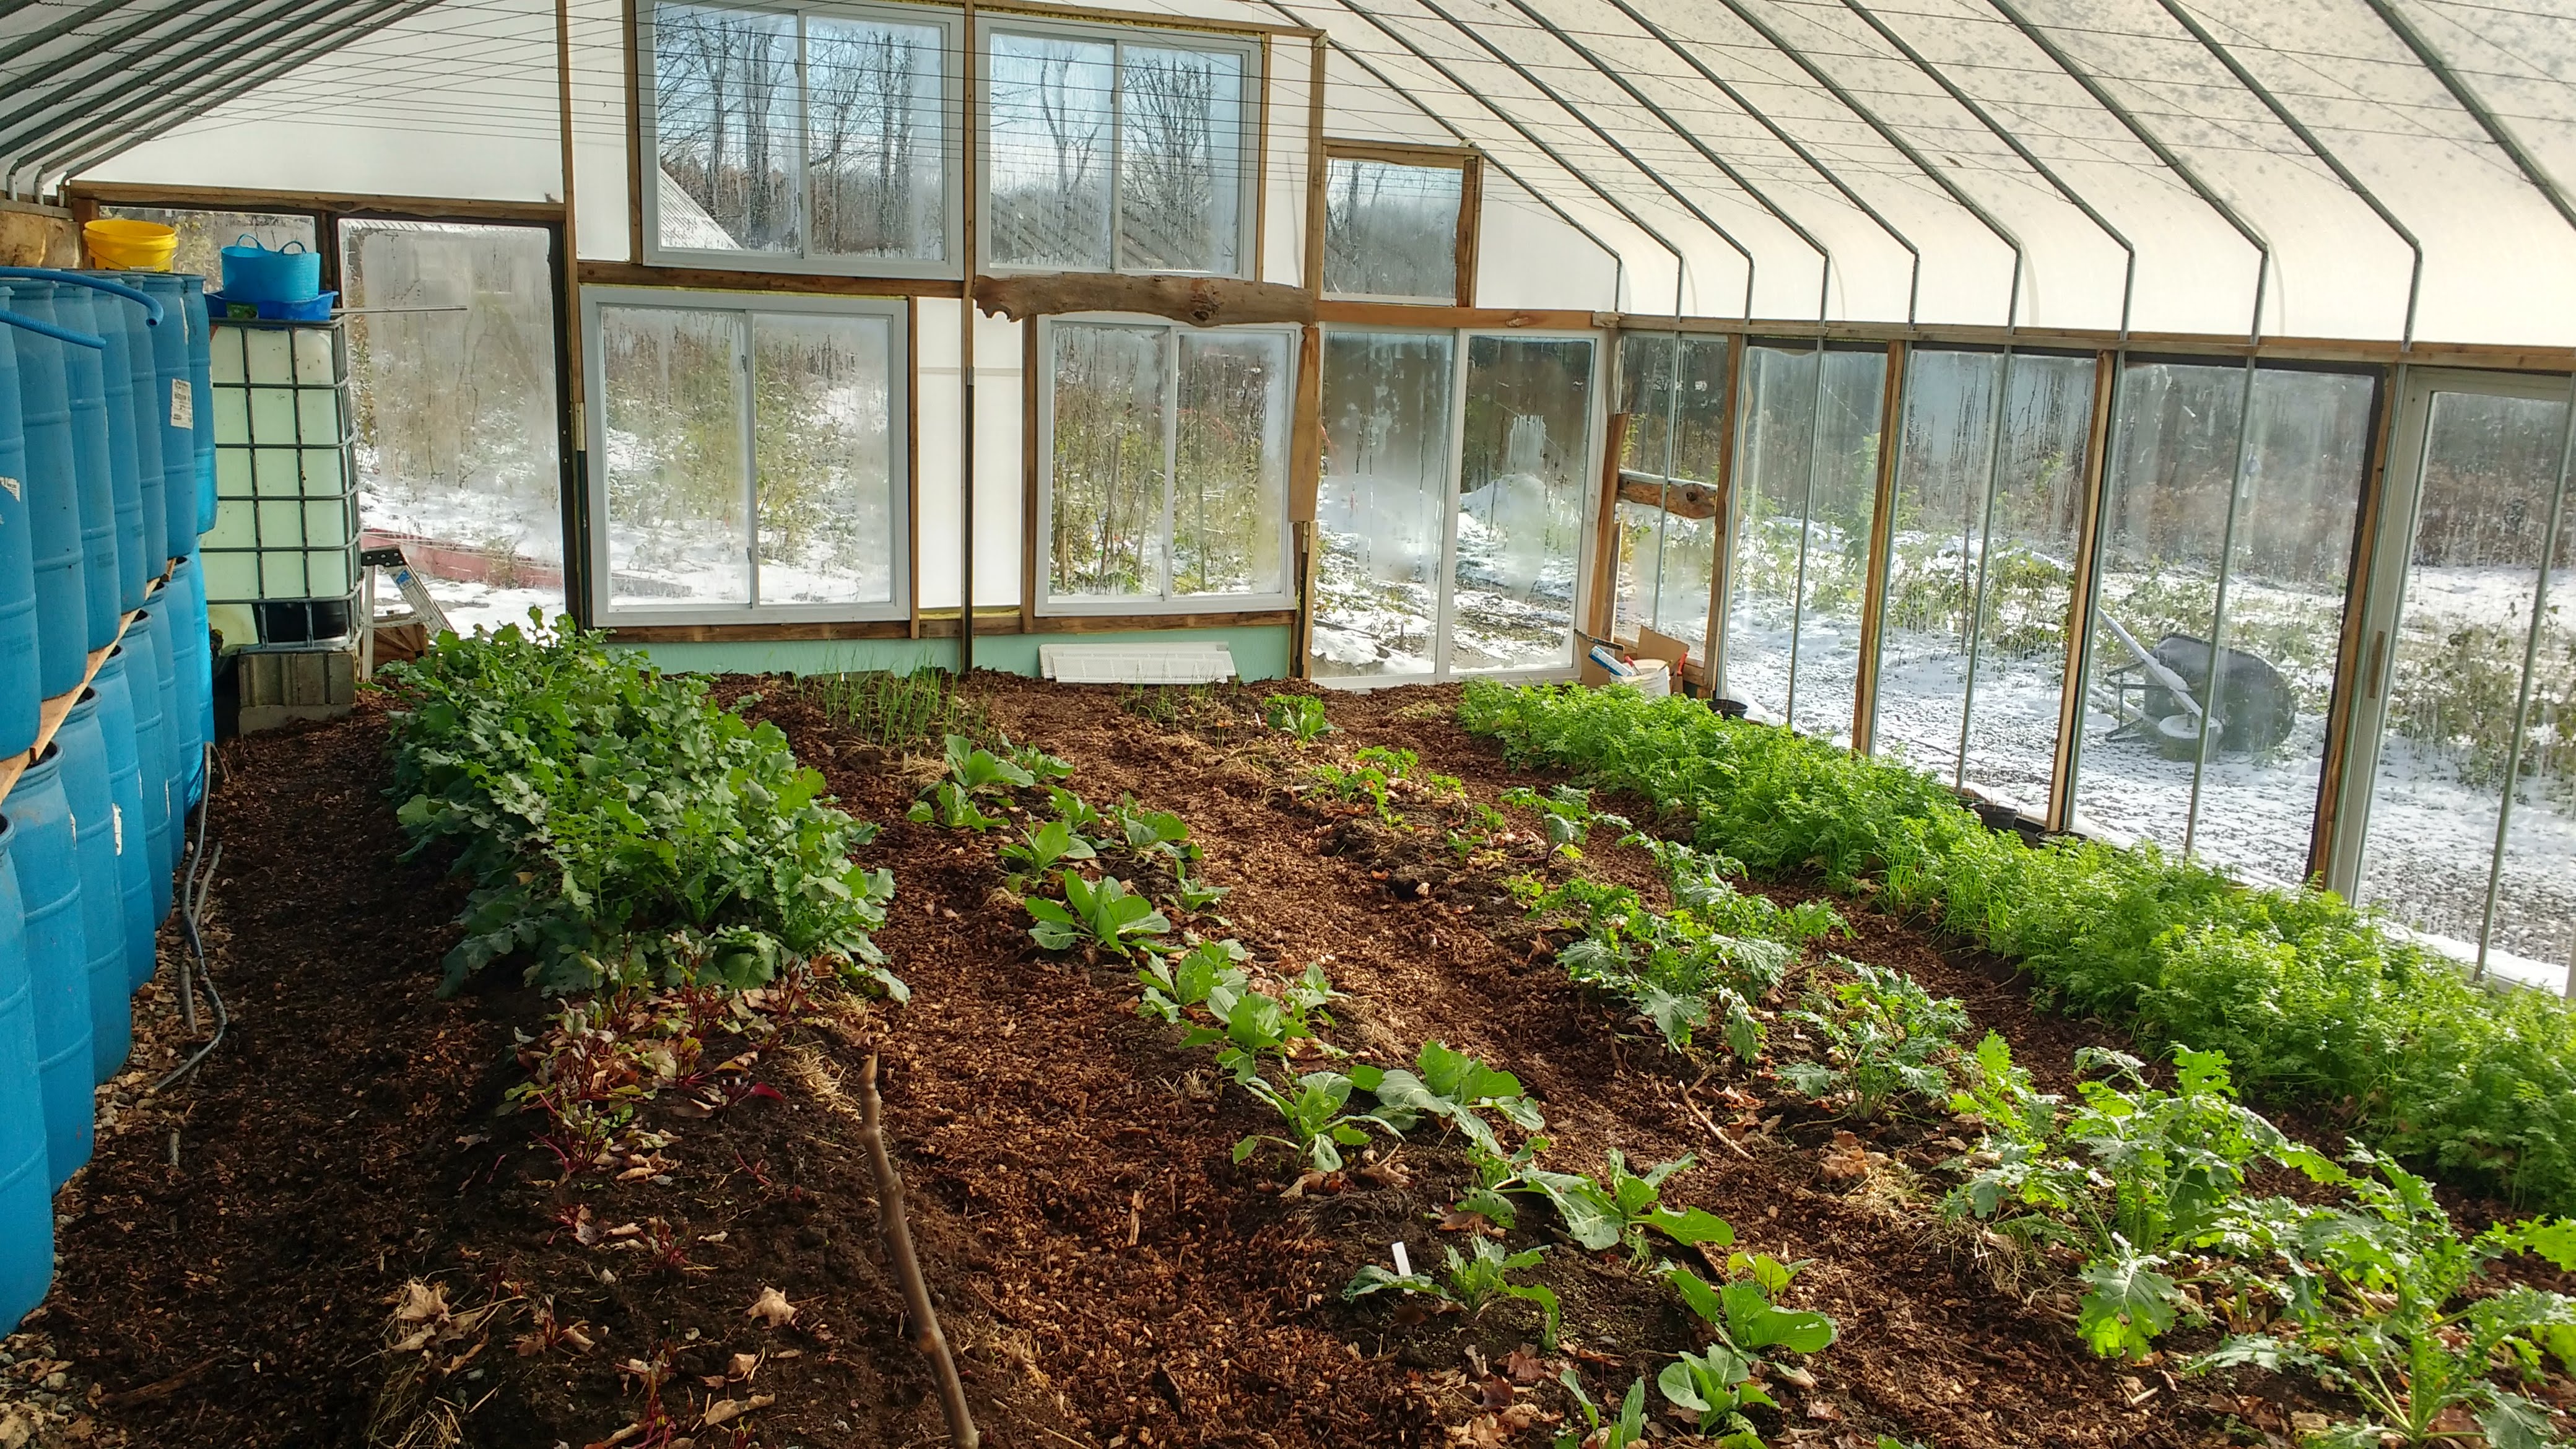
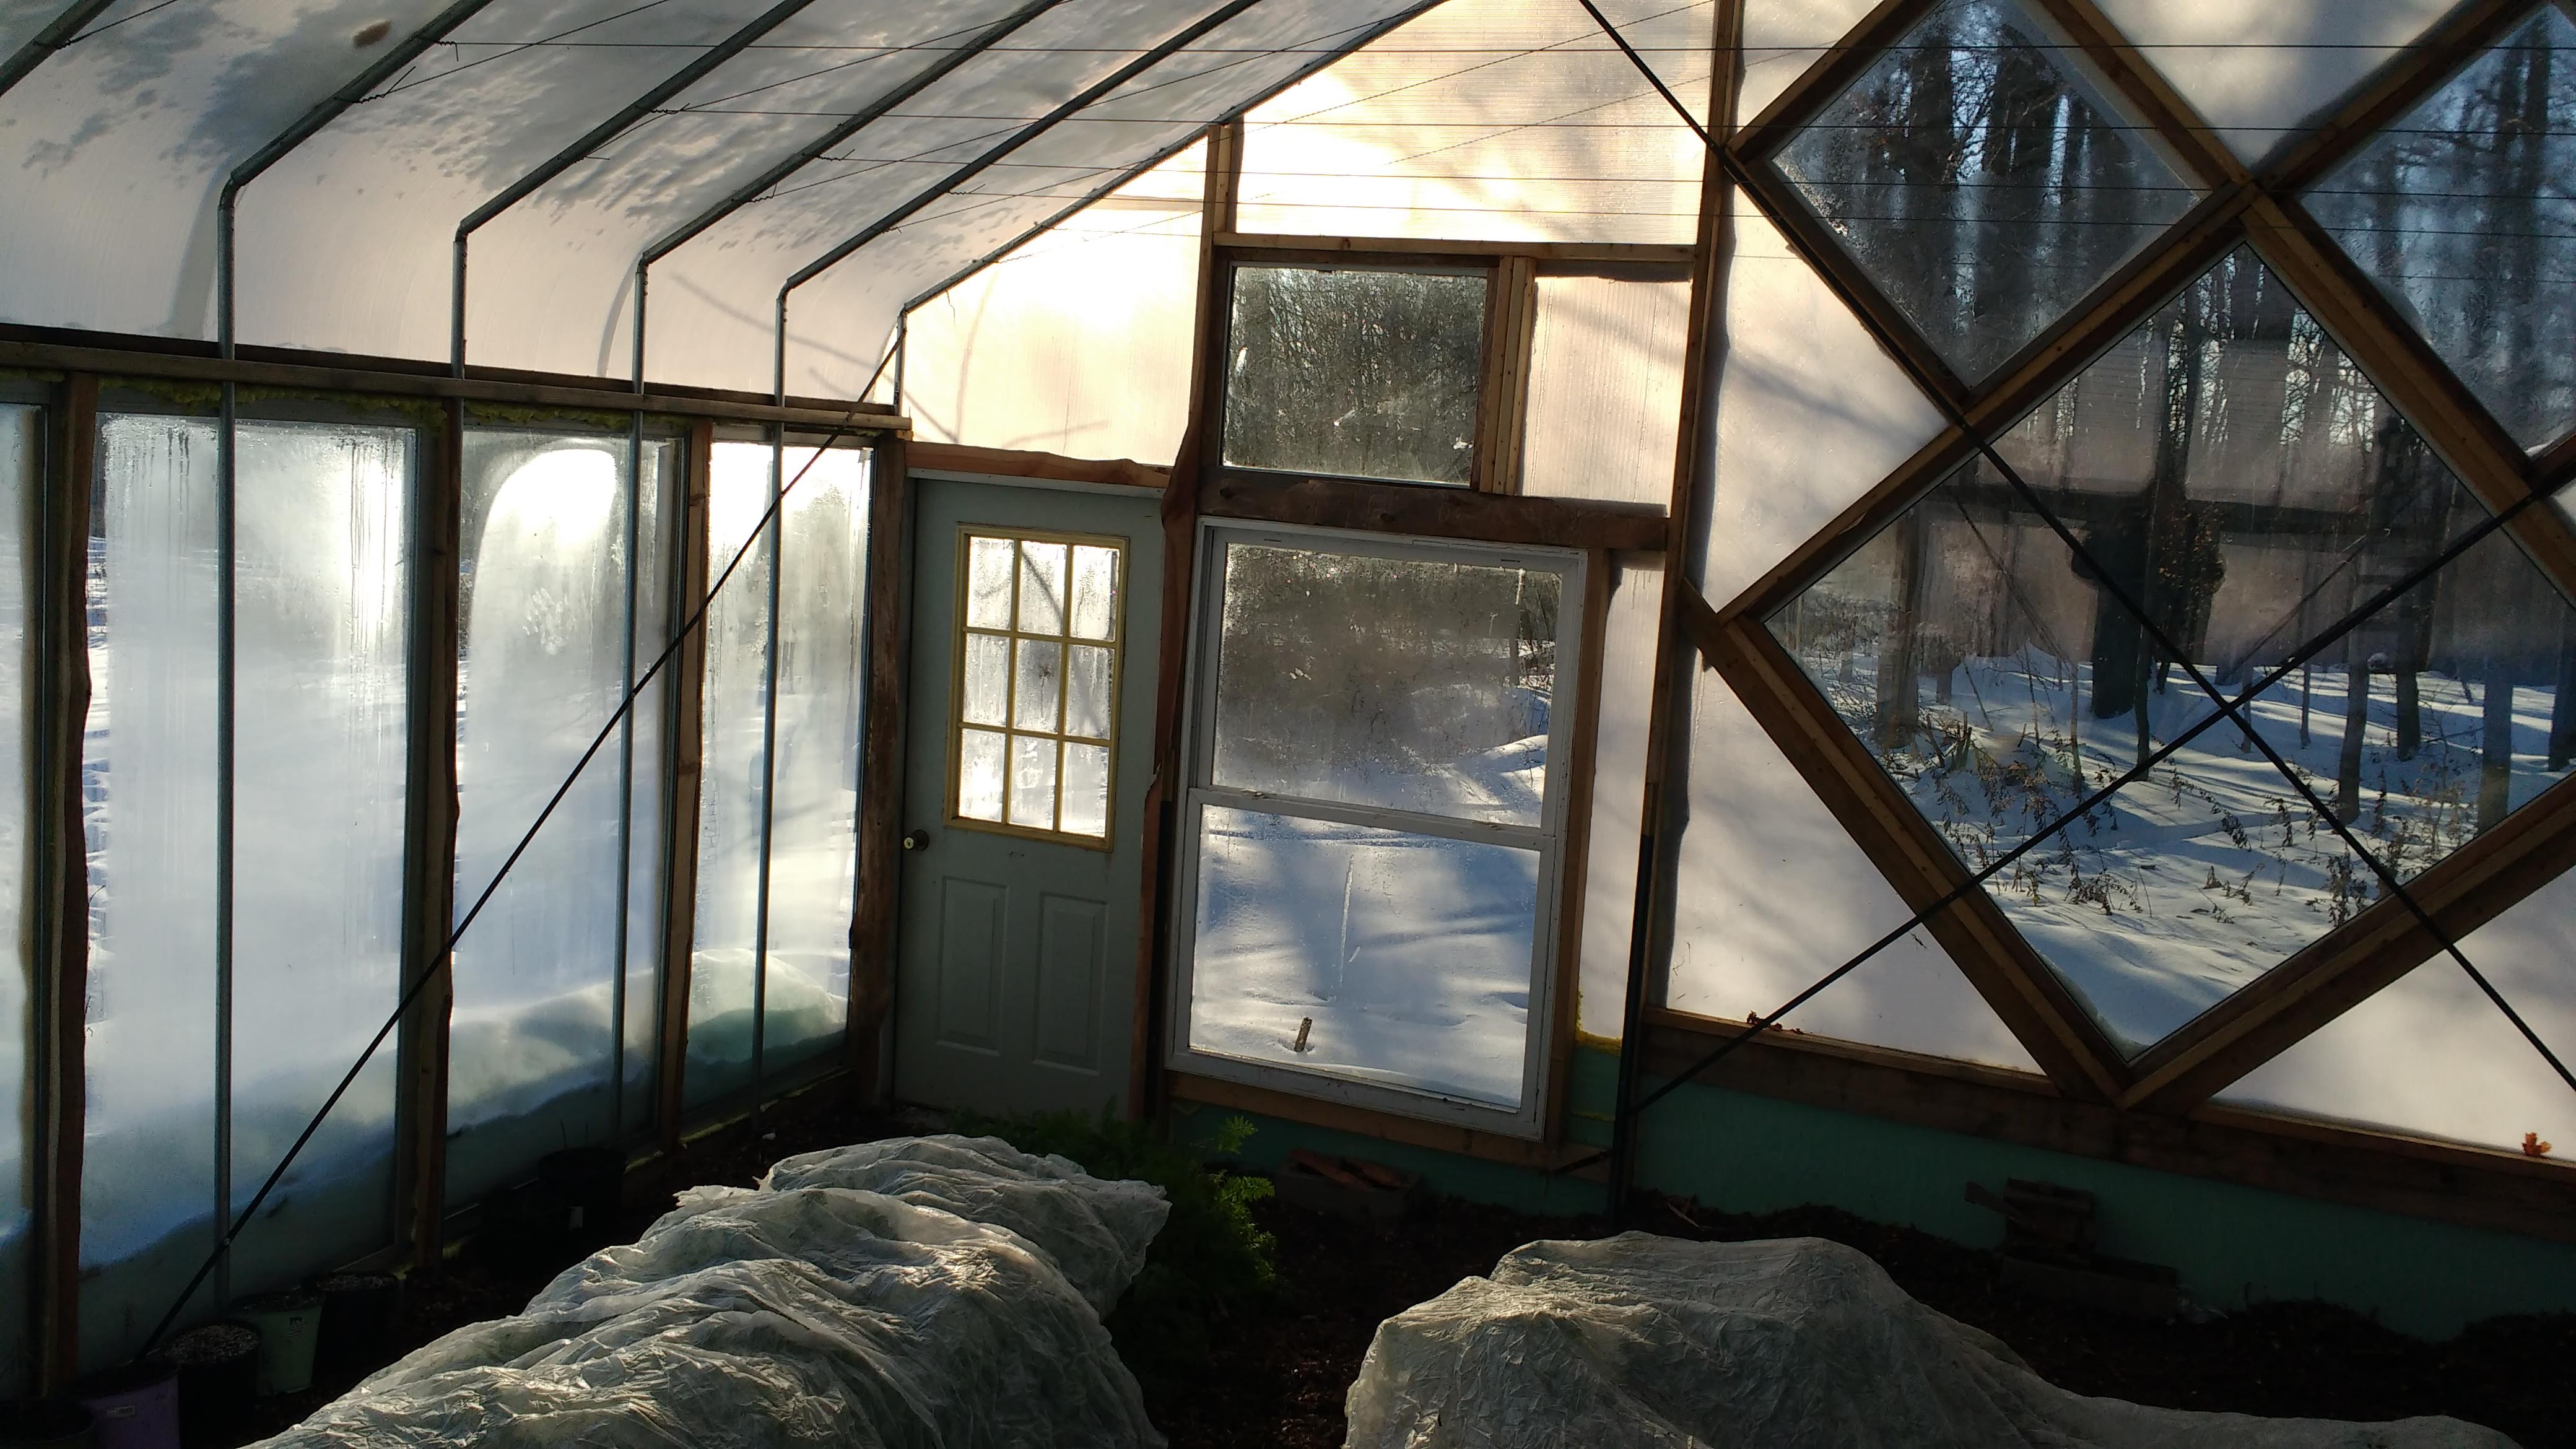
To prepare the beds we dumped several loads of cow manure then covered it with hay and then lots of 3 yr old composted willow mulch. On the top, we put a bunch of seaweed which is a miracle fertilizer if you are growing food and don’t want to use anything artificial. The isles were filled with wood chips which do a great job of making a nice place to walk and keeping moisture in the soil.
We ended up putting several 1″ Larch boards in between the water tanks because we wanted to tie the whole wall together in case the tanks settled at all. With nearly a foot of gravel, we haven’t seen much settling or heaving with the water tanks. In total, we have a total of over 2000 gallons of water which work as a great thermal mass. Even when the weather is very cold it is not necessary to cover the plants with row covers.
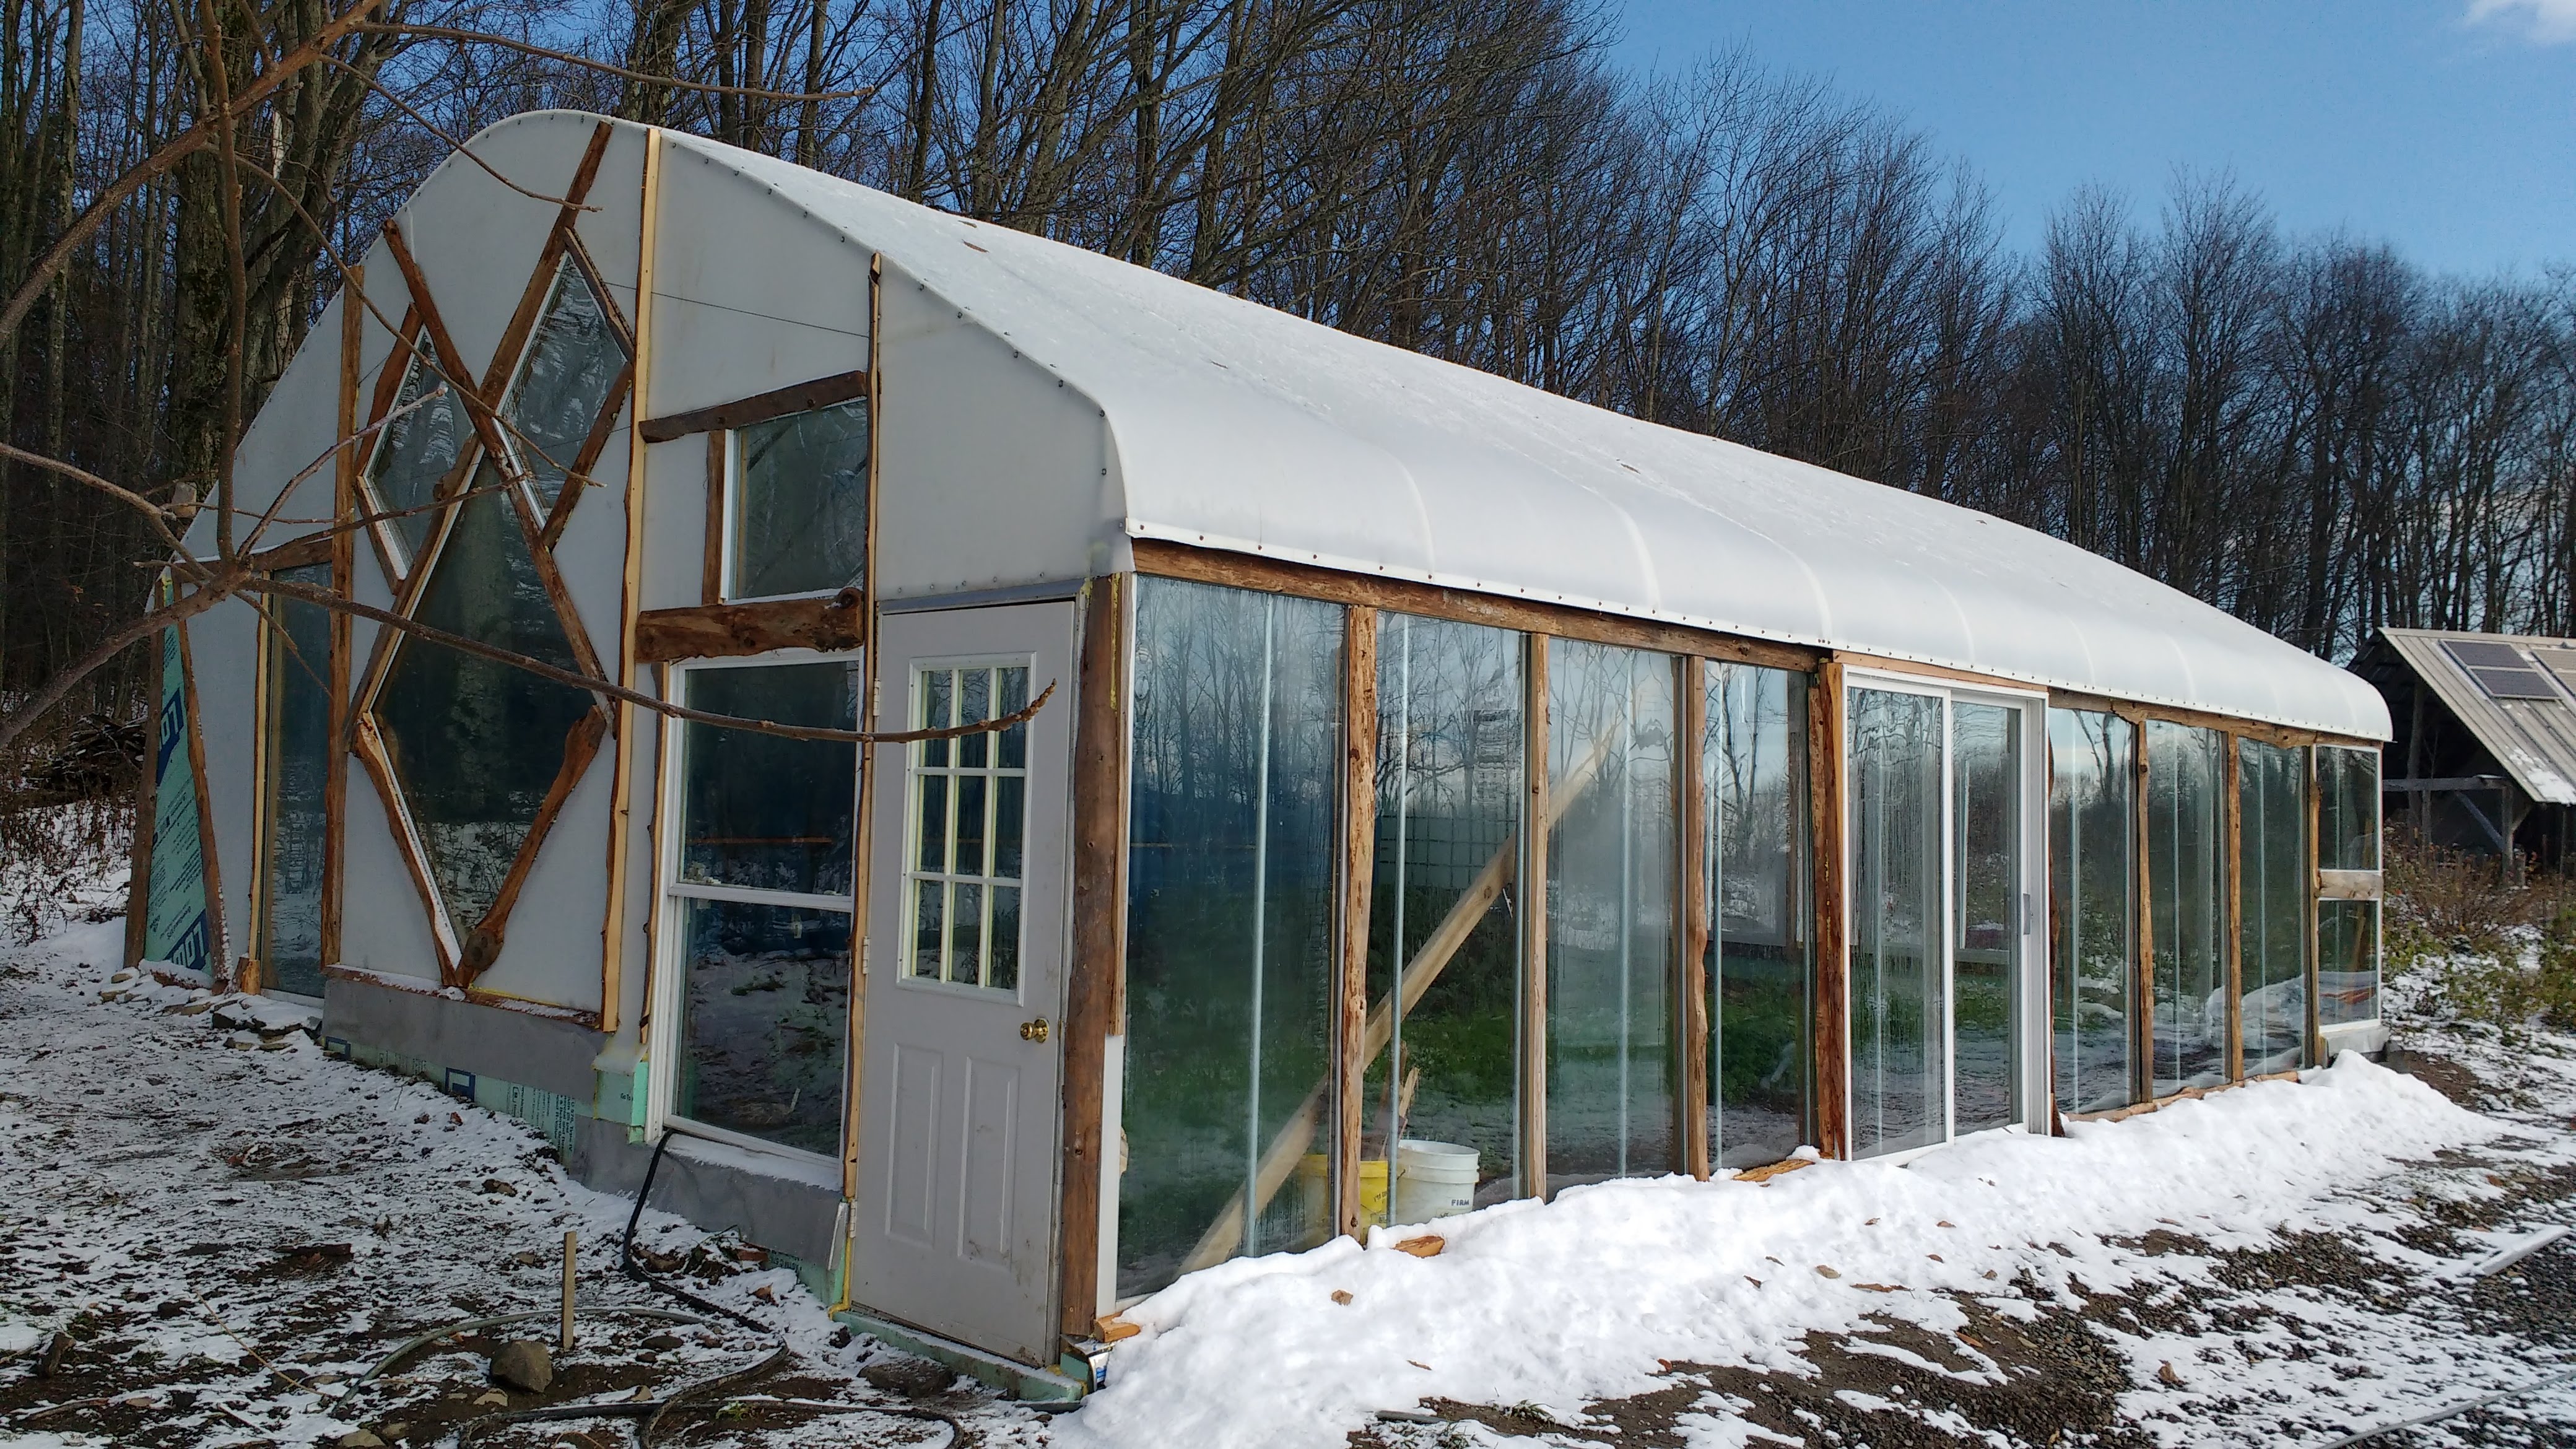
When we were initially looking at buying the greenhouse, everything we looked at was over $4000 for the size we wanted without the covering. We ended up scoring 18 24′ galvanized arches on craigslist delivered by a really nice ex-Amish guy for less than $350 total. These arches were reinforced with steel cross cables and were already over 20 years old, but didn’t have any rust or wear on them at all. The biggest problem is that they were insanely heavy and quite sketchy to install with only 2 people.
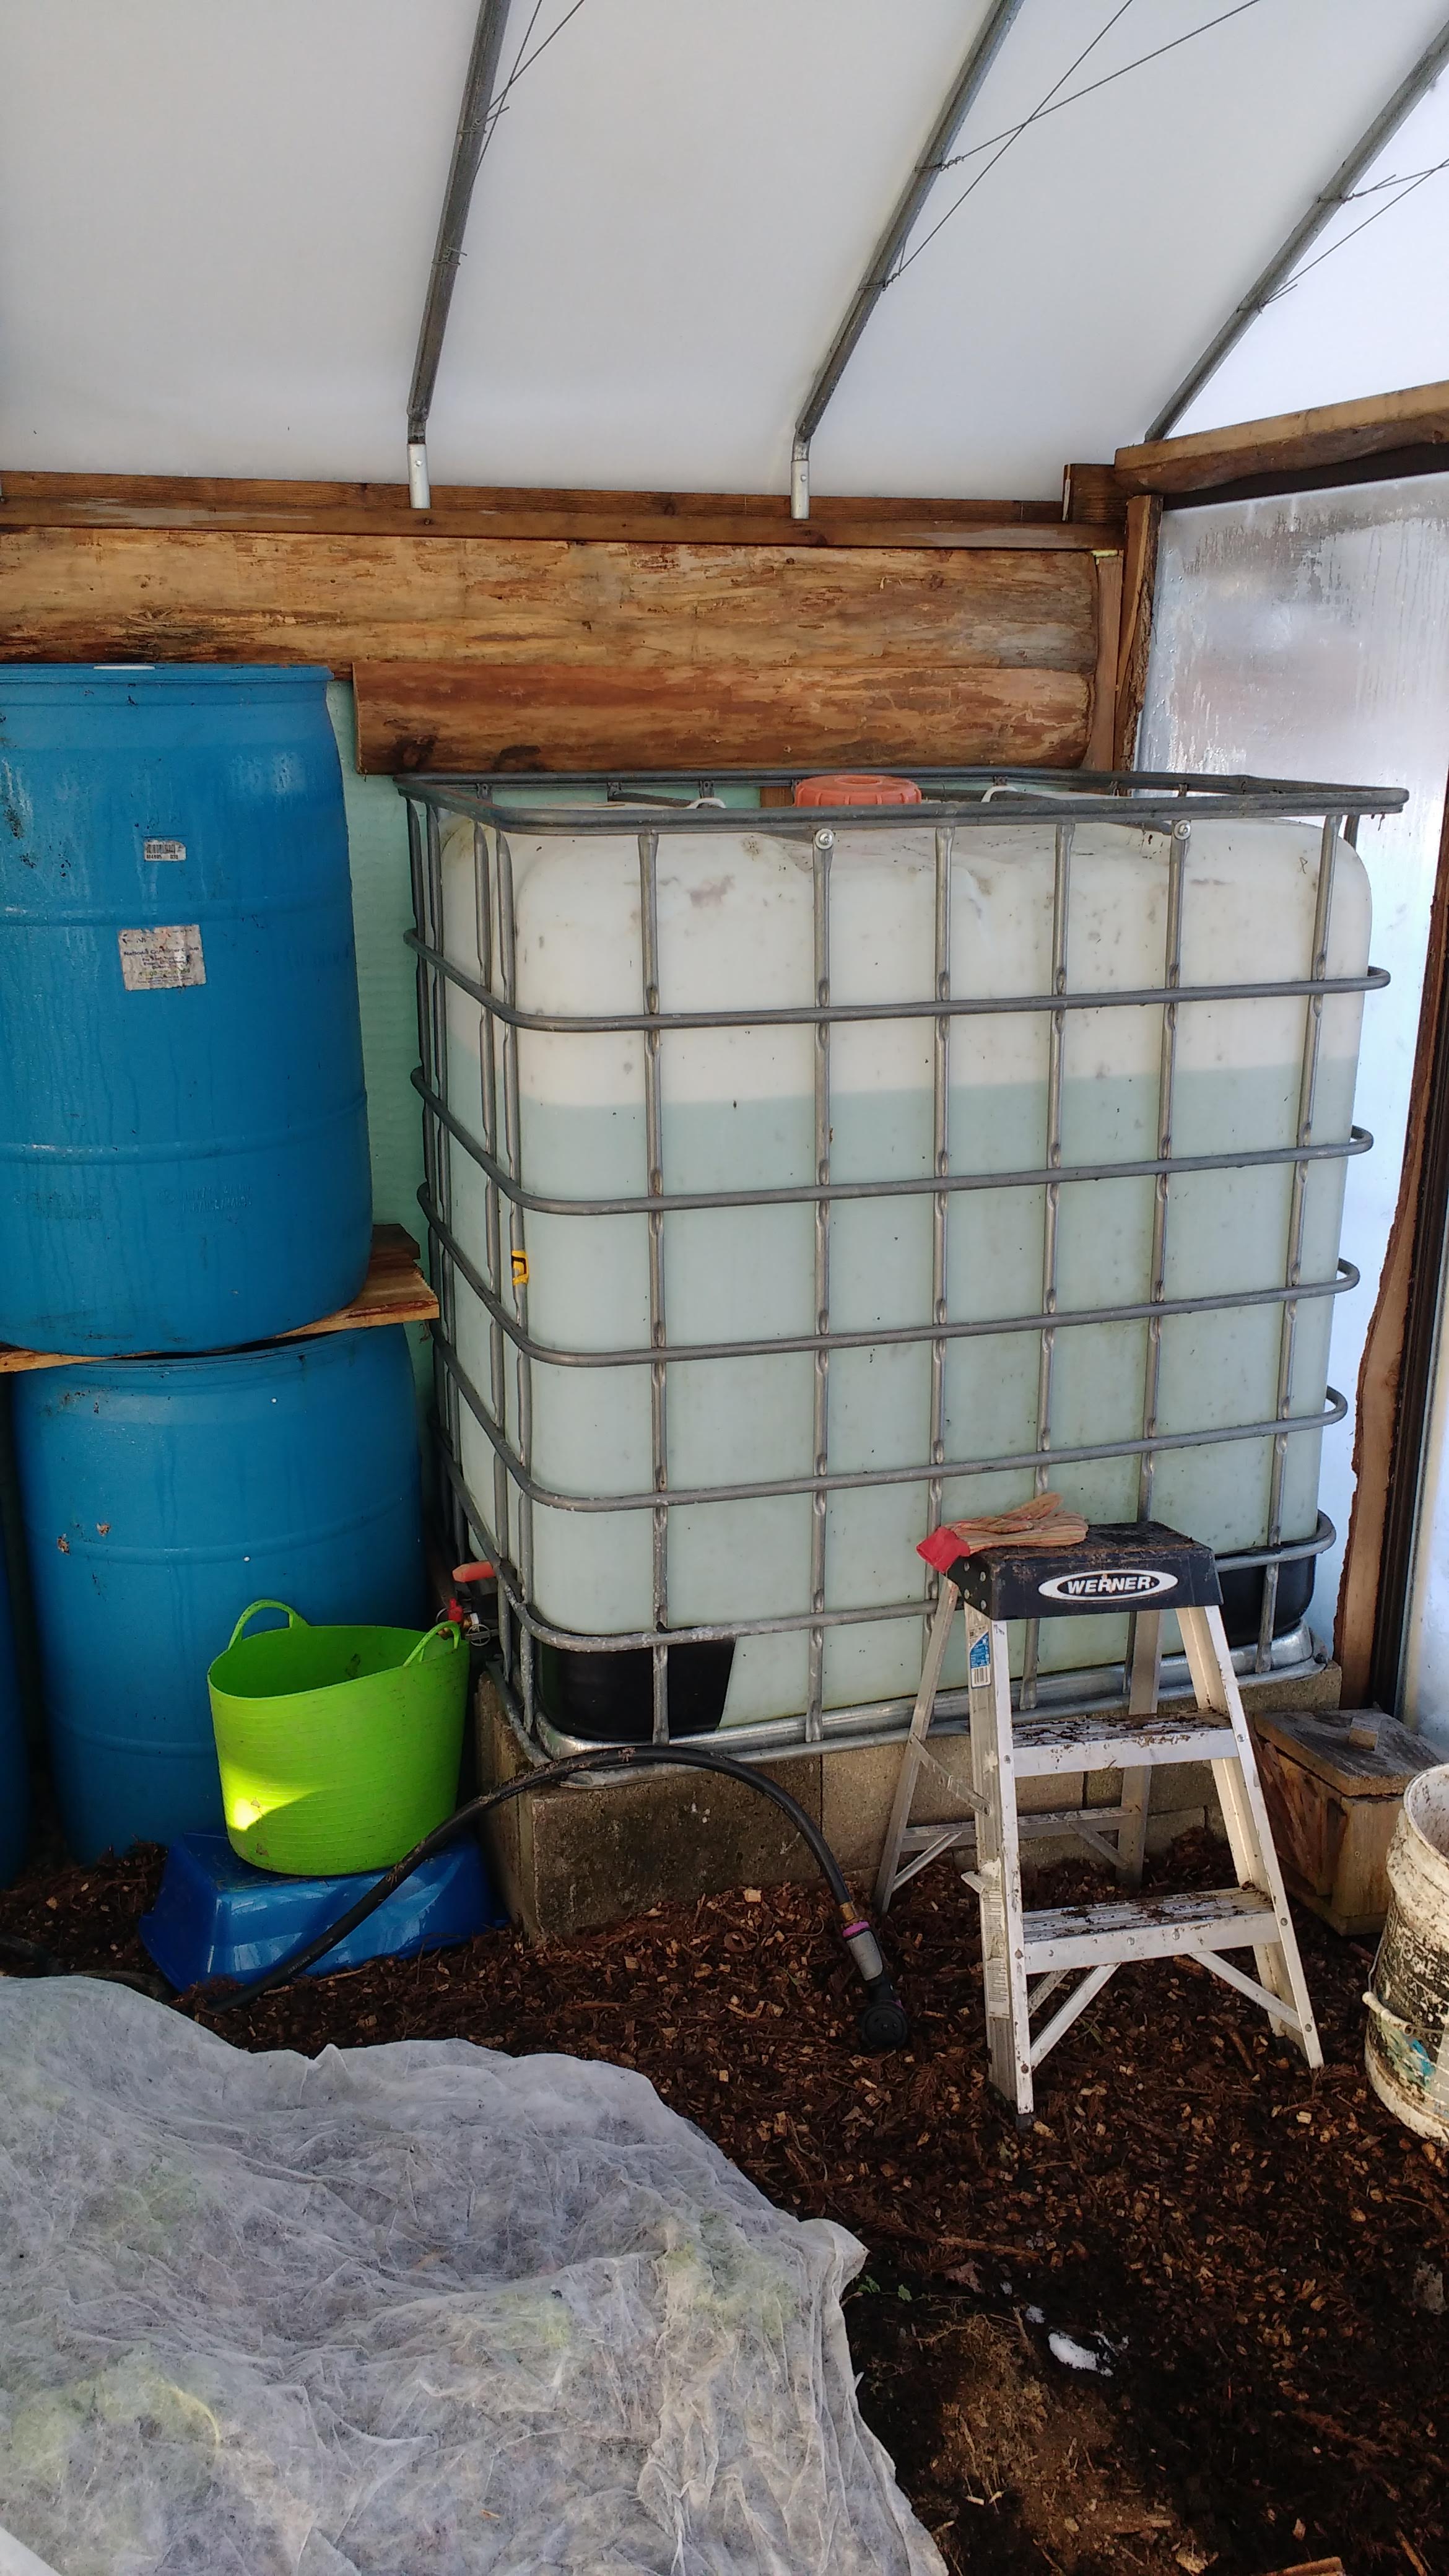
Our water tank we scored for free from a friend of ours that wasn’t using it. You can usually get them for about $100 on craigslist. I thought the water connector was threaded, but it turns out the threads are only for a dust cover. On the tote we have it uses a camlock system to install a garden hose which run about $30.
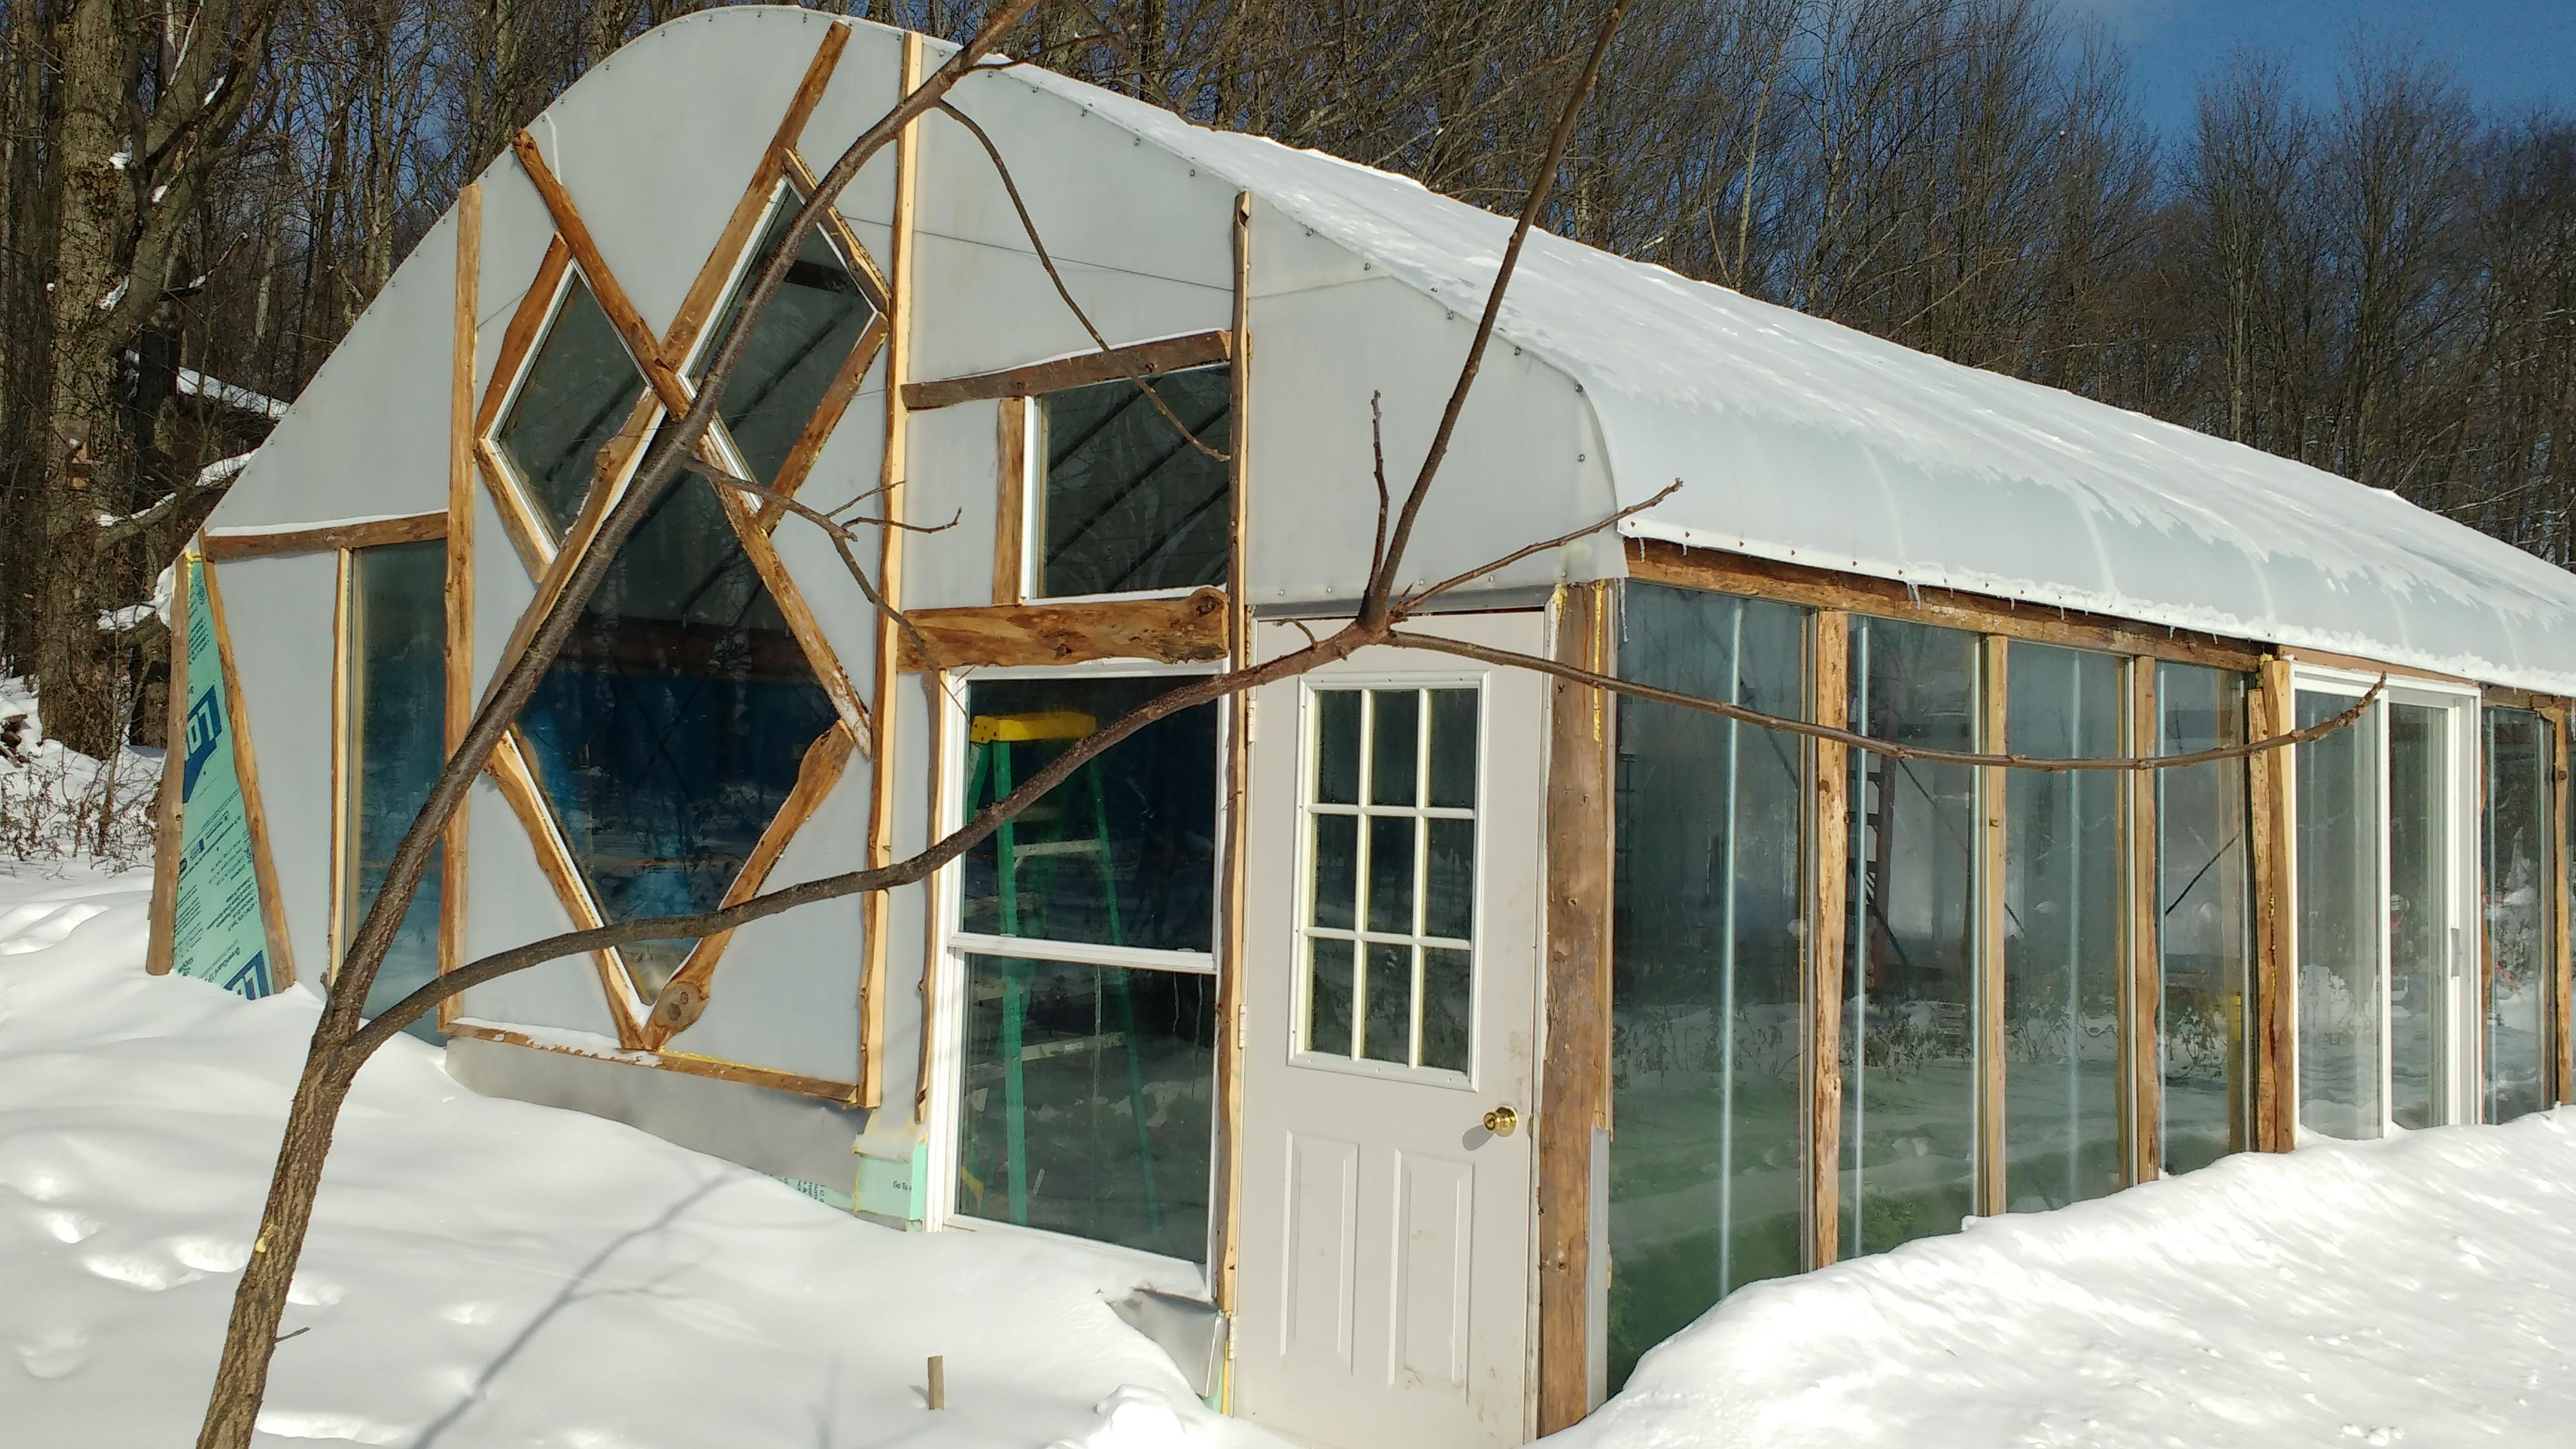
I mounted the windows on the W wall in a nice diagonal pattern so they look like Mickey Mouse ears. What I didn’t realize is that is was going to be much harder to flash it that way. I ended up using a Vicor like rubber tape that was coated with sticky stuff and about 4 inches wide around all of the windows. We also had to seal around all of the doors and windows that way.
When putting up the North wall I simply ripped 1 x 3 inch wide strips of larch and got some very long screws and then screwed from the front piece of wood to the rear piece of wood with Thilde pushing against the rear board. If you use the spray foam in the crack this makes a very solid support for the insulation board without any framing and it’s safe to bury the larch under dirt and it shouldn’t rot.
I used spray foam as a glue for putting up the trim and that worked surprisingly well. For every piece of trim I would only put in 2 screws and when the foam dried it worked like a very powerful glue to help hold the trim in place. When putting up trim I spent a lot of time making sure it wasn’t going to block any of the light coming through the Solexx. That meant most of the time I was ripping boards down to make them super narrow and then just attaching them to the wooden 2×4 framing for the greenhouse.
You need to make sure that the windows are closed and latched for winter. The water can get in the cracks and freeze causing the windows to deform and crack open. Also every year before the winter you should go around and check every part of the greenhouse to make sure there are no air leaks. Plug anything you can find with spray foam, silicone or stuff wool insulation in the cracks.

The way I built the greenhouse it has almost no lateral stability so I bought a giant roll of metal strapping and then installed diagonal pieces on each of the 3 inside walls. The north wall has large blocks of insulation that work to support the building from laterally collapsing. The Solexx is rated for a 4′ snow load on 4′ centers but that felt pretty insane so we built the greenhouse with 2′ centers. Where we live in Truxton it’s not uncommon at all to get 4 feet of heavy wet snow and we didn’t want the greenhouse to collapse in the winter time on us.
Sliding glass doors are problematic in the winter. Not only do they collect snow and ice in the track, but they tend to get water around the frame and freeze shut. You can get reused sliders cheap, but often they have lost the seal between the panes and they will fog up. We ended up with 3 sliding doors that were foggy and tried to use them in the back of the greenhouse where they would not make as much of a difference.
When it gets below about 10 degrees at night we often cover the plants with a light row covering cloth. This cloth does a great job of maintaining a few degrees warmer temperatures and can keep the plants from freezing. If it gets below 0 F you can also run a small propane heater on low to make sure that the greenhouse does not freeze. We found that it was rare that we needed to run any heat in the greenhouse, as most of the times as long as there was some sun the water got warm enough to keep it from freezing at night.

You can build a year round greenhouse even in really cold climates for around $5sq/ft that is reasonably well insulated. Every reuse center has piles of old windows and sliding glass doors that they sell for pennies on the dollar and with newer materials like Solexx you can get insane R values with a 20 year no-yellowing guarantee. When it comes to projects like this you can’t over think it, just set a budget and go for it.

Pingback: My Dirt Cheap UTV : One Year On A Sur-Ron Light Bee Electric Motocross Bike | ElectricBike-Blog.com
Pingback: My Dirty Cheap UTV : One Year On A Sur-Ron Light Bee Electric Motocross Bike | ElectricBike-Blog.com
Pingback: My deep, dark descent into attempted sustainability | ELECTRICBIKE.COM
Pingback: DIY unheated greenhouse grows food year-round in Upstate NY – Hydroculture Global
Pingback: ≫ Mi profundo y oscuro descenso hacia el intento de sustentabilidad