
Thilde and I decided last winter that we wanted to do something about her crappy wood-stove. Due to her chemical sensitivities we basically had to burn wood with the flue open so all the heat went right up the chimney. Because we didn’t have an outside air intake the air that whooshed up the chimney was usually the air right around the wood-stove that had heated up a little bit. The house was always freezing and we burned through a ton of wood.

My dad built a Crossfire stove into his addition about 10 years ago which is more of a masonry radiant heating system than it is a wood-stove. The idea is that you start a big fire, it burns super hot and then you keep all the flue gasses trapped and the 4000 pounds of rock works like a giant thermal battery slowly radiating heat out into the room over the day. These stoves are often called Russian stoves/fireplaces or Finnish stoves/fireplaces. These masonry heaters generally have a very small window if any at all, as you want the heat to get stored in the unit, not escape out the glass. Jon at Crossfire had a different idea. He wanted to build a unit that had a HUGE window in it so you could see the fire through the glass, and then enough heat storing chambers so that it could still heat the house for 12 hours or more.
I sent Jon an email telling him our predicament and he had a used stove that he was willing to sell me at a discounted cost. I told him right away that we wanted it. It took a few months for him to get it together and then I drove my sprinter 12 hours up into Canada to pick up the stove. Normally transporting this stove across the border would have cost well over $800 but we were doing it on the cheap and my sprinter can easily carry all 2500lbs of the core. The sprinter did great, and actually drove a whole lot better than usual with all that weight in it.
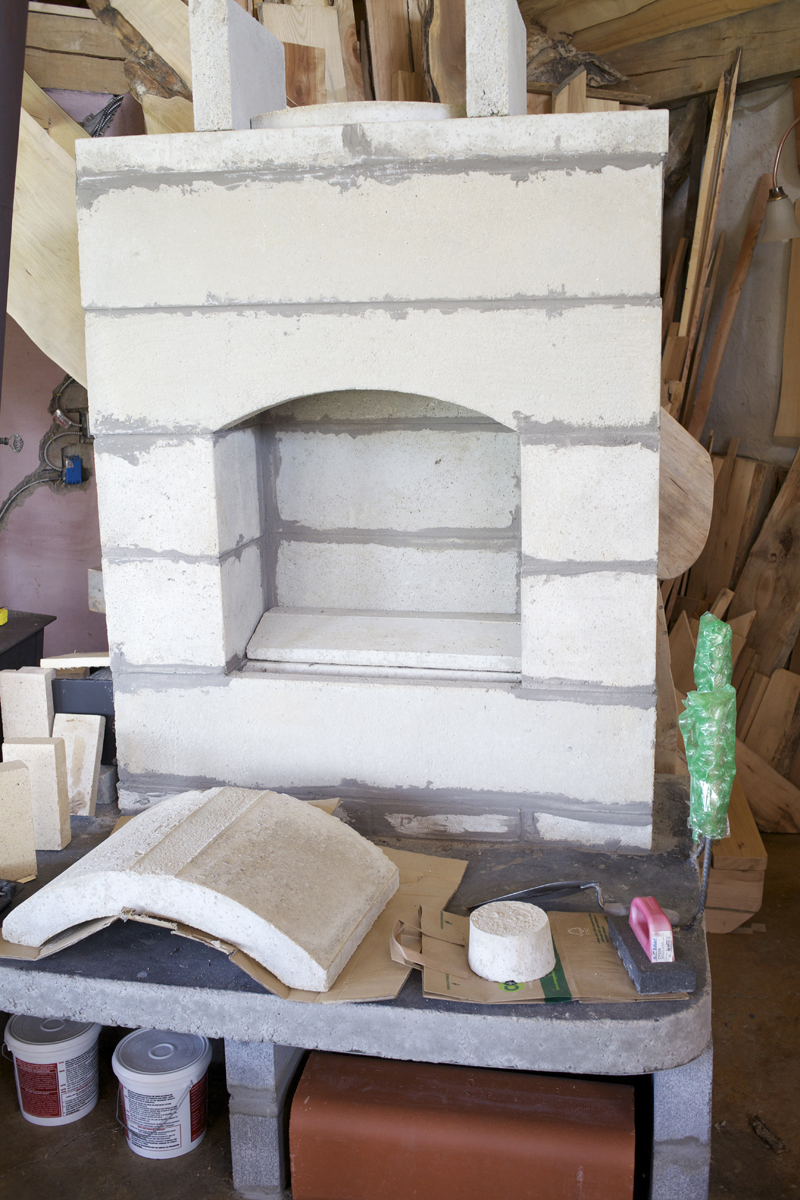
Thilde and I worked to build up the ash dump using concrete block. Although I had never laid block before in my life, it was easy and we finished it in a day. It took another day to build a form and we poured a huge 1000lb slab on top of the block. We built the form out of recycled metal from rooftop air conditioners my father had scavenged 30 years prior. It took us another day to build the core up which was actually really fun. The blocks stacked together like Lego. Although a few of the blocks had to be modified to fit, mostly the kit was a no-brainer.
It took several days to build up the flue pipe system. I couldn’t find adapters so I build a casing out of old firebricks from the inside of our old wood-stove and cemented them to some 8″ flue tile then mated the flue tile to our existing stovepipe with an adapter we bought online. Everything had tiny strips of ceramic wool crammed into every crack then cemented over. The cast iron door for the chimney clean-out was siliconed shut with high temp silicone. Thilde was very apprehensive about any fumes or smoke getting into the house for obvious reasons.
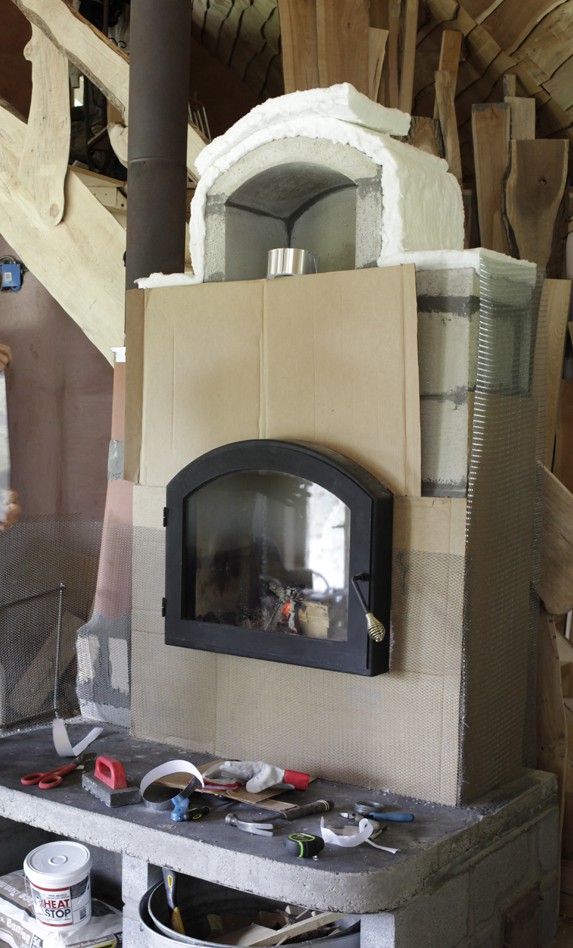
We wrapped the core with cardboard which would eventually burn off and would create an expansion area between the core and the facia. We covered the cardboard with 2″ of ceramic wool on the back and top to keep the heat radiating out the front of the stove. The we started the hard work. We covered the whole stove with wire mesh, you know, the kind that tears the crap out of your hands. Then we started mixing mortar. We did 2 layers of mortar mix on top of the wire mesh. After the first layer of Mortar I panicked because the wire mesh was not staying flush against the core. There can only be a tiny 1/4″ space otherwise the heat won’t transfer from the core to the shell. I quickly put an array of clamps all over the stove and it ended up looking quite absurd. In the end it worked, there was no gap between the cardboard and the facia.
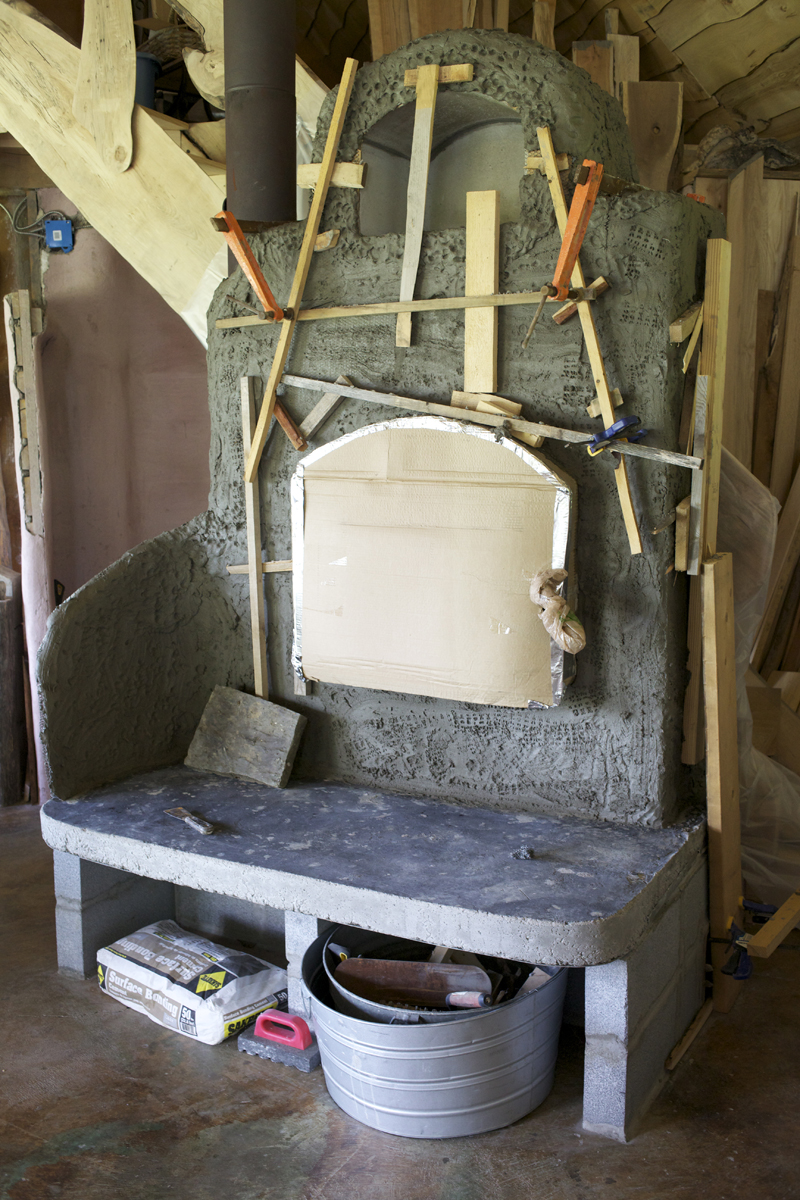
We collected many different rocks from Shindagin creek and from the creek that ran through the land trust. It was fun sorting through them and deciding which ones to use. We ended up using quite a few to make a really beautiful facia for the stove as well as using different colored stones around the stovepipe where it joined the stove. Putting the layers of lime and plaster up was pretty tedious, we ended up doing about 3 layers of plaster made with sand, clay and lime. Then we did one finish coat of Mica and Lime (Thilde’s special recipe). When we were finished we mounted the tiny oven door on the top and fired it up.
We didn’t have the outside air intake setup yet and I was amazed at how much air was rushing into the stove when we fired it. It was like a vacuum cleaner with a 5″ hose. You could hear the air rushing in to the combustion chamber. It took a couple of weeks for the stove to stop smelling and for the cardboard to disintegrate, but we are 1/2 way though the winter and I can safely say that this stove is the best money and time we’ve ever spent.
When you first start the fire it gets a little bit smokey outside, but once it is burning it burns amazingly clean and smells like a hot charcoal grill, not like a wood-stove. The stovepipe rarely gets over 200 degrees and there is almost no creosote buildup at all.
The house is now about 5-10 degrees warmer all the time and we are burning much less wood than ever before, about 50% less. We can also just set it and forget it, unlike our old stove which was like a noisy toddler constantly demanding our undivided attention. The main fire is easy to light and generally burns for an hour or two, but the surface is hot to the touch for over 12 hours. I did the calculations for cost and just from a wood saving standpoint this stove will pay for itself in about 10 years and after that it will be saving us about $300 a year in energy costs for it’s entire 50+ year lifespan. That’s a total of $12,000 saved in 40 years (not adjusted to inflation).
I would highly recommend the crossfire stove to anyone looking to possibly build a masonry heater.
For those who are curious if a masonry heater would work for them, I say if your foundation can take the weight…go for it.

Pingback: Winter is here, my favorite time of year for ebiking | ELECTRICBIKE.COM
Pingback: ≫ Llegó el invierno, mi época favorita del año para andar en bicicleta